
How to Wash Winter Gloves: A Complete, Safe Guide for Every Material
Your winter gloves soak up sweat, skin oils, road salt, and whatever you touched on the way to the car. Here is exactly how to wash them without shrinking the wool, cracking the leather, or wrecking the insulation and waterproof lining.
Why and When to Wash Winter Gloves
Most people treat gloves like a coat that never needs cleaning. You pull them on in November, stuff them in a pocket in March, and never think about what happened in between. But a pair of gloves is one of the few pieces of cold-weather gear that touches your skin, your phone, your steering wheel, shopping cart handles, and snowy railings all season long. They get dirty fast, and the dirt does more than smell bad.
Sweat is the first problem. Your hands produce moisture even in freezing temperatures, and that moisture soaks into the lining. Over time it mixes with skin oils and bacteria, which is where the sour, locker-room odor comes from. Salt is the second problem. Road salt and sidewalk melt leave white, crusty residue on leather and fabric that stiffens fibers, draws moisture, and can slowly crack leather. Grime is the third: oil, dirt, and grease clog the tiny air pockets in insulation, so the glove traps less heat than it did when new.
Signs your gloves are overdue for a wash
- A lingering smell that returns even after airing them out.
- Shiny, dark patches on the palms and fingertips where oils have built up.
- White salt lines or a stiff, crunchy feel around the cuffs.
- Water that soaks into the outer fabric instead of beading up and rolling off.
- Gloves that feel colder than they used to, even though nothing is torn.
How often should you wash them?
There is no single schedule, but a practical rule works well. Everyday commuter gloves benefit from a gentle wash two or three times per season. Heavily used work, ski, or snow-shoveling gloves can use a wash every month or two if they are sweaty or visibly dirty. Leather gloves need far less frequent deep cleaning, often just once a season, with light wipe-downs in between. Washing too often is a real risk, because every wash is a small stress on stitching, glue, and waterproof coatings. Aim for clean, not spotless.
Quick rule of thumb: If you can smell them from arm’s length, or the palms look shiny and dark, it is wash day. If they only look a little dusty, a damp cloth and an air-out will do.
Before you start, one note on wet gloves: if your gloves are simply soaked from snow rather than dirty, you do not need a wash. You need proper drying, and our guide on how to dry wet gloves covers that in detail. Washing and drying go hand in hand, though, so the drying steps later in this guide will help in both situations.
What happens when gloves never get washed
Dirty gloves do not just smell; they perform worse and wear out sooner. Body oils and sweat soften leather and break down stitching over time. Salt dries out fibers and leaves them brittle. Grit acts like fine sandpaper inside the lining and between layers each time you flex your fingers. Dirty insulation also compresses and holds less air, so the glove feels thinner and colder than it should. For people with sensitive skin, built-up residue can also irritate the hands, especially when gloves are damp. A regular, gentle wash is one of the cheapest ways to protect both your hands and your investment.
Wash day versus drying day
It helps to think of glove care as a two-day job. Wash in the evening, press out the water, and set the gloves to dry overnight so they are ready the following day or the one after. Plan around your weather and your spare pairs. Washing a single pair on the morning of a snowstorm leaves you with wet gloves and cold hands, which is exactly what you were trying to avoid.
Stock up on a gentle cleaner made for delicate fabrics before you start.
Shop gentle glove detergents on AmazonKnow Your Glove Materials Before You Wash
The single biggest reason gloves get ruined in the wash is that they were treated like a pair of cotton socks. A winter glove is often a small engineered sandwich: an outer shell, a waterproof or windproof membrane, an insulating layer, and a soft lining. Each layer reacts differently to water, heat, and detergent. Identify what you own first, and the rest of the process becomes simple.
Common winter glove materials and how they behave
| Material | Washing risk | Best approach |
|---|---|---|
| Wool and wool blends | Shrinks and felts with heat and agitation | Cool hand wash with wool-safe soap, lay flat to dry |
| Fleece (polyester) | Low risk; can pill if scrubbed hard | Gentle hand wash or delicate machine cycle, low heat |
| Synthetic insulation (such as Thinsulate-style fill) | Clumps if wrung or heated hard | Hand wash, press water out, air dry |
| Down fill | Clumps and loses loft when not fully dried | Mild soap, low-heat dry with dryer balls |
| Leather | Stiffens, cracks, and shrinks when soaked | Damp-cloth clean and leather cleaner; no soaking |
| Waterproof membrane shells | Coating wears away with harsh detergent | Technical wash, rinse thoroughly, low-heat dry |
| Touchscreen fingertips | Conductive thread can wear with scrubbing | Dab gently; avoid scrubbing the fingertips |
Many gloves mix several of these. A ski glove, for example, may have a leather palm, a nylon shell, a waterproof membrane, synthetic insulation, and a fleece liner. When materials are mixed, treat the glove according to its most delicate component. If any part is leather, follow leather rules for that part; if the insulation is down, follow down rules.
Insulation matters more than you think
If you are curious how the lining affects both warmth and washing, it is worth comparing the two most popular choices. Our breakdown of Thinsulate vs fleece gloves explains how each behaves in cold and wet conditions. For washing purposes, both tolerate gentle hand washing well, but synthetic insulation is more sensitive to hard wringing and high heat, while fleece is more forgiving but can pill if scrubbed.
Waterproof or just water-resistant?
This distinction affects how you wash. A truly waterproof glove contains a membrane layer that blocks liquid water. A water-resistant glove usually relies on a surface coating that sheds light moisture. Coatings are easier to strip with harsh soap, so they need extra care. If you are unsure which you own, read waterproof vs water-resistant gloves before washing, since it will also tell you how to judge whether your gloves still protect as well as they should afterward.
Looking to replace a pair that is beyond saving? Browse insulated winter gloves.
See insulated winter gloves on AmazonRead the Care Label and Test for Colorfastness
Every washing job starts at the cuff. Turn the glove inside out or look at the sewn-in tag near the wrist. This small label tells you what the manufacturer expects, and it overrides any general advice, including mine. If it says dry clean only, or spot clean only, take that seriously. A label that permits hand washing in cold or lukewarm water gives you the green light for the method in this guide.
What the care symbols usually mean
- Basin with a hand: hand wash only, and keep the water gentle.
- A number in the basin: maximum water temperature in degrees Celsius, so 30 means cool to lukewarm.
- Crossed-out triangle: do not use bleach, including oxygen bleach.
- Crossed-out twisted square: do not wring.
- Crossed-out tumble dryer: air dry only.
- Flat square with a line: dry flat, not hanging.
No label? Use the cautious default
Many gloves lose their tags, or never had them. In that case, assume the gentlest method: cool water, a mild soap, no wringing, no heat, and flat drying. That approach is safe for almost every material except leather, which has its own rules later in this guide.
Do a quick colorfastness test
Dark dyes, particularly deep reds, navy, and black, can bleed when wet. Before you submerge the pair, dab a small hidden area, such as the inside of the cuff, with a white cloth dampened with a drop of your cleaner and water. Press for ten seconds. If any color transfers to the cloth, wash the gloves alone and use an extra-cold rinse, or switch to spot cleaning. Never wash a bleeding pair with light-colored items, and avoid soaking them for long.
Pro tip: Take a quick phone photo of the care label before washing. Tags fade and tear, and next season you will be glad to have the instructions saved.
Keep a set of spare white microfiber cloths handy for testing and spot cleaning.
Get microfiber cloths on AmazonGather Supplies and Brush Off Loose Debris
Washing goes more smoothly when everything is within reach. You do not need specialty gear, but a few small choices make a real difference to how your gloves come out. Set up near a sink or a clean basin, lay a towel on the counter, and collect the items below before the gloves get wet.
What you will need
- A mild detergent: wool wash, baby shampoo, or a gentle liquid soap with no bleach, no brighteners, and no softener.
- A clean basin or sink: big enough that the gloves can sit without being crushed.
- A soft brush: an old soft toothbrush or a soft nail brush is ideal.
- Two clean towels: thick, absorbent, and not shedding lint.
- A drying surface: a mesh rack or a flat towel away from direct heat.
- Optional extras: white vinegar for odor, baking soda for deep smells, and a technical wash if the gloves are waterproof.
Dry-brush first
Before any water touches the glove, shake out loose grit, then brush the surface lightly. Wet dirt smears and soaks in; dry dirt lifts away. Work from the cuff toward the fingertips with short, light strokes. Pay extra attention to creases in the knuckles and between the fingers, where sand and salt crystals hide. Turn the glove inside out if the lining is fleece and tap it over a trash can, since lint and dust collect there.
Empty and prepare the glove
Remove any liners, hand warmer pockets, or separate inner gloves, and wash them as their own items. Pull the cuff cinch cord loose, undo straps or clips, and unzip any pockets. Check seams for loose threads. A small thread tail can unravel in the wash, so snip it instead of pulling.
Choose the right soap
The best soaps for gloves are the ones that rinse out completely. Heavy detergents leave residue that attracts dirt and breaks down waterproof coatings. Fabric softener is a firm no, because it coats fibers and reduces both insulation and moisture-wicking. Chlorine bleach destroys leather and weakens elastic. If your gloves have a waterproof membrane, a technical cleaner made for outdoor gear is the safest option.
A soft-bristle brush and mild wash make cleaning far easier.
Shop soft cleaning brushes on AmazonPre-Treat Stains and Odor
If you toss stained gloves straight into a basin, the stain often sets while the rest of the glove gets clean. Pre-treating takes five extra minutes and dramatically improves the result. The goal is to loosen the stain or neutralize the smell without scrubbing so hard that you damage the fabric.
Everyday dirt and grease
For general grime or oily spots, place a drop of mild dish soap or wool wash directly on the stain. Work it in with your fingertip or a soft brush using gentle circles. Let it sit ten to fifteen minutes so the soap can break down the oils. Dish soap is designed to cut grease, which makes it excellent for palms and fingertips, but use only a small amount, since it can be hard to rinse out of thick fabrics.
Sweat odor
Odor lives deeper in the lining, so surface cleaning is not enough. A mix of one part white vinegar to three parts cool water, lightly sprayed or dabbed on the lining, helps neutralize the smell. Alternatively, sprinkle baking soda inside the glove, let it sit for several hours or overnight, then shake it out thoroughly. Both methods work without harsh chemicals, and you can combine them with the wash that follows.
Salt stains
Winter salt leaves pale tide lines on leather and fabric. For fabric gloves, the same vinegar-and-water mixture dissolves salt well. Dab it on, wait a few minutes, and blot with a clean cloth. For leather, use a cloth barely dampened with the vinegar mix, and wipe once, never saturating the surface. Follow with a leather conditioner later, as covered in the special cases section.
Ink, mud, and other tough marks
- Mud: let it dry fully, brush away what you can, then treat what remains.
- Ink: dab with a cloth dampened with rubbing alcohol, testing a hidden spot first, then rinse.
- Gum or sap: chill the glove briefly so the residue hardens, then lift it off gently.
- Blood or food: use cold water only, since heat sets protein stains permanently.
Remember: Test any pre-treatment on a hidden area first. If the color changes or the fabric looks rough, stop and use plain mild soap instead.
An odor-neutralizing, fragrance-free cleaner is gentler on fibers than perfumed sprays.
Find odor eliminators on AmazonHand Wash Gently in Cool or Lukewarm Water
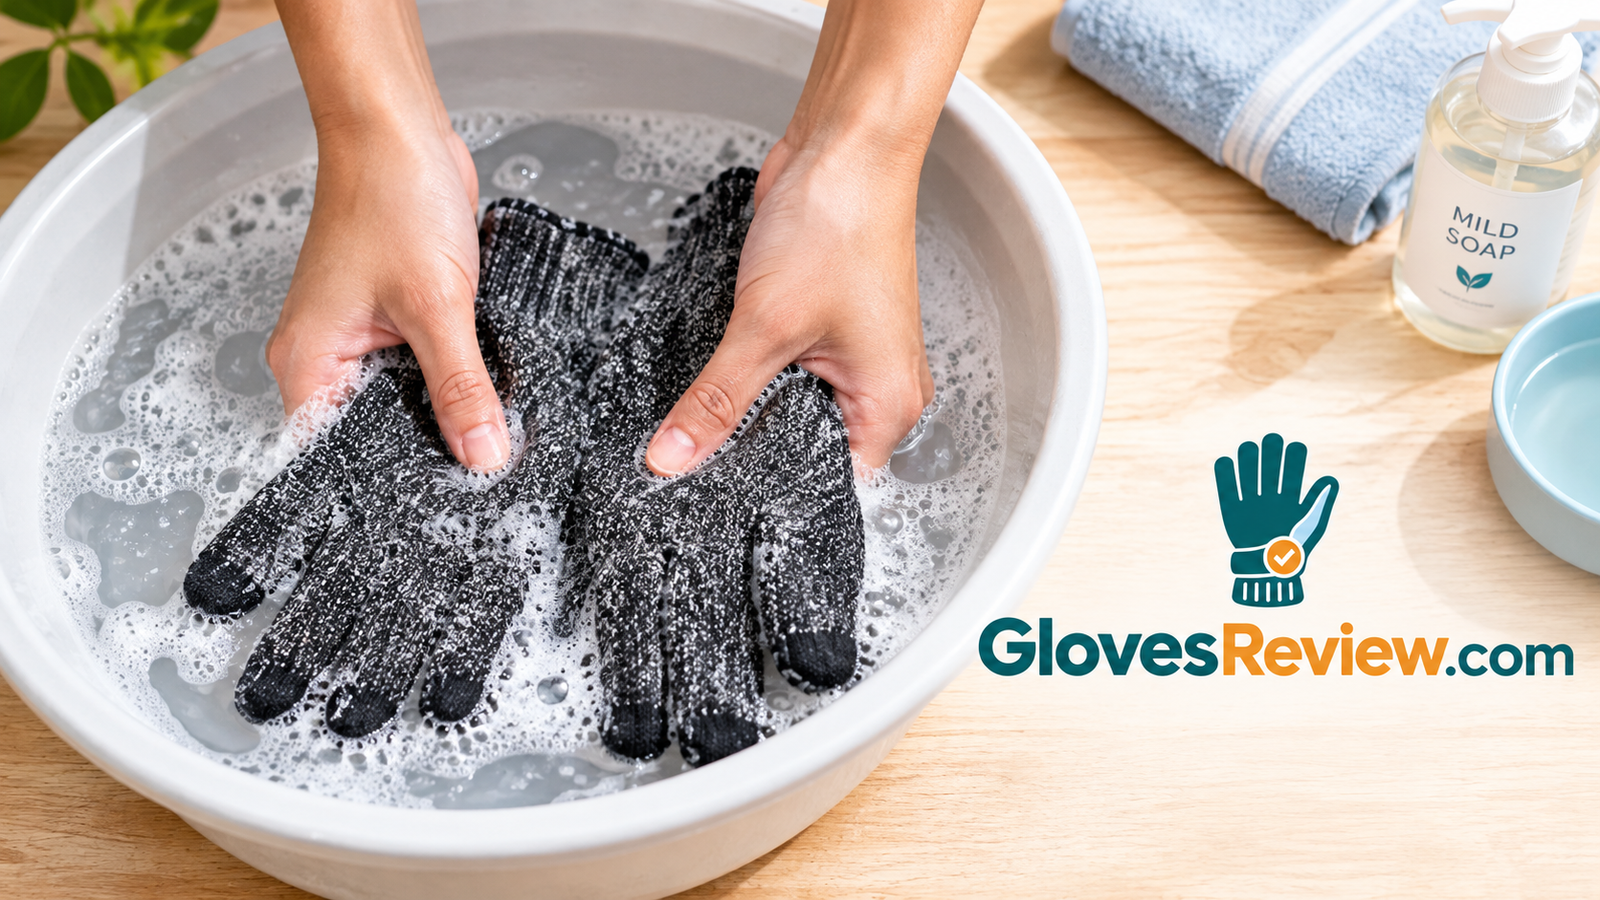
Hand washing is the safest method for nearly every winter glove, and it is the method I recommend first. It gives you complete control over how much agitation the glove receives, and it is easy on stitching, adhesives, and coatings. You can do the whole thing in a sink in about ten minutes of active time.
The method, in order
- Fill the basin with cool to lukewarm water, about as warm as comfortable bath water for a baby, never hot.
- Add a small amount of mild detergent, about a teaspoon for a basin, and swirl to dissolve it before the gloves go in.
- Submerge the gloves and press down gently so the water soaks through the shell and insulation. Waterproof shells may resist at first, so hold them under for a minute.
- Squeeze each glove slowly in a pressing motion, working the soapy water through the fingers and palm.
- Use the soft brush on stubborn spots, using light strokes along the fabric.
- Let them soak for ten to twenty minutes. Heavily soiled pairs can sit up to thirty, but longer than that is rarely helpful.
- Press and squeeze again briefly, then drain the dirty water.
Why water temperature matters so much
Hot water relaxes the structure of wool, which makes it shrink and felt, and it can weaken the glue that bonds layers in technical gloves. It also activates some stains, making them permanent. Cool or lukewarm water is enough to dissolve soap and lift dirt without risking the glove. If the care label allows a specific temperature, stay below it.
Do not do this
- Do not twist or wring the gloves. It shreds insulation and stretches knit fabric.
- Do not scrub fabric against itself. That causes pilling and abrasion.
- Do not leave them soaking for hours or overnight, especially if leather or dyed fabric is involved.
- Do not mix detergents with bleach or add fabric softener.
The two-bath method for very dirty gloves
If your gloves are heavily soiled, a single soak can leave the dirt redistributed through the fabric. Use two baths instead. In the first, wash briefly to lift the worst grime, then drain and press the gloves gently. In the second, use fresh water with a smaller amount of soap for the actual cleaning. This approach keeps the final wash water cleaner, so the gloves come out brighter and the rinse is faster. It is especially useful for light-colored gloves, work gloves, and pairs that have been used for gardening or shoveling through slush.
Cleaning the inside of the glove
The lining collects most of the sweat and odor, so it deserves attention too. Turn the glove inside out if the construction allows, or open the cuff wide and work soapy water through it by pressing and squeezing. Avoid scrubbing fleece, because it pills. For gloves with a sewn-in liner that cannot be turned out, fill the glove with soapy water, hold the cuff closed, and gently massage the outside so the water moves through the inside.
Waterproof gloves: if yours have a membrane, avoid ordinary laundry detergent. Its additives can clog the membrane’s pores and reduce breathability. A technical wash made for outdoor gear rinses clean and protects the coating.
Technical cleaners are designed to wash waterproof gear without stripping its performance.
Shop technical gear wash on AmazonRinse Until the Water Runs Clear
Rinsing is the step people rush, and it is the one that most often causes problems later. Soap that stays in a glove attracts dirt, leaves stiff patches, irritates skin, and, in technical gloves, blocks the membrane. Take your time here. Your hands will thank you the first cold morning you wear them.
How to rinse properly
- Drain the basin, then refill with fresh cool water, or hold the gloves under a gentle tap.
- Squeeze each glove in a slow, pressing motion so the clean water flushes through the insulation.
- Watch for bubbles. Keep going until the water you squeeze out is completely clear and no suds appear.
- Repeat once more than you think you need to. Thick insulation holds soap deeper than it appears.
Add a vinegar rinse for odor and softness
If the gloves still smell, or the fabric feels slightly stiff, finish with a final soak in cool water with a splash of white vinegar, roughly a quarter cup to a basin. The mild acid breaks down soap residue and neutralizes lingering odor. Rinse once more in plain water so the vinegar smell does not stay. Skip this on leather, which does not like soaking, and on any glove whose label advises against acids.
Why thorough rinsing matters more for waterproof gloves
Residue clogs the microscopic pores of a breathable membrane. The result is a glove that stops breathing, so sweat stays inside and your hands feel clammy even though the outside stays dry. If your gloves feel strangely damp inside after a wash, that is a classic sign of leftover soap. Rinsing again usually fixes it.
Keep a stock of white vinegar and gentle laundry basics for rinse and odor control.
Shop white vinegar on AmazonRemove Excess Water Without Wringing
This is the moment where many pairs of gloves are quietly ruined. Wringing feels natural, but it twists the insulation, stretches knit fabric out of shape, and tears the stitching inside waterproof liners. The better method is to press the water out, which is just as fast and far kinder.
The towel-roll method
- Lift the glove out of the water and let it drain for a few seconds, supporting the cuff so nothing stretches.
- Lay a thick, clean towel flat and place the glove along one edge.
- Roll the towel around the glove like a jelly roll.
- Press down firmly with your palms, or gently walk your hands along the roll, so the towel absorbs the water.
- Unroll, flip the glove, and repeat with a dry section of towel if it is still dripping.
For gloves with thick insulation
Very puffy gloves, particularly those with down or heavy synthetic fill, hold a surprising amount of water. Do a second towel press, then a third if needed. Pressing and patting, not squeezing, helps preserve the loft. Your goal is damp, not dripping, before moving on to drying.
Why not use a spin cycle or a salad spinner?
Fast spinning forces the layers against each other and can detach the lining from the shell. It can also tear liners and flatten insulation into dense clumps. A towel is slower but much safer. If you must speed things up, a very short, low-speed spin inside a mesh bag on a delicate setting is the most you should attempt, and only if the label allows machine washing.
Never: hang wet gloves by their fingertips, twist them like a rag, or hold them near a heater to speed things along. All three shorten a glove’s life.
Thick, absorbent towels make this step quicker and gentler on your gloves.
Shop absorbent towels on AmazonReshape and Dry Slowly, Away From Direct Heat
Drying is where the quality of your wash is either locked in or lost. Gloves that dry too fast shrink, stiffen, and crack. Gloves that dry too slowly stay damp inside and smell sour within days. The target is steady, gentle airflow at room temperature, with the gloves supported in their natural shape.
Reshape first
While the gloves are still damp, gently pull the fingers into their natural shape and smooth out the cuff. Tuck the thumb into position. If the fingers feel shrunken, stretch them slightly and hold for a few seconds. Reshaping now prevents stiff, curled fingers later.
Lay flat or use proper airflow
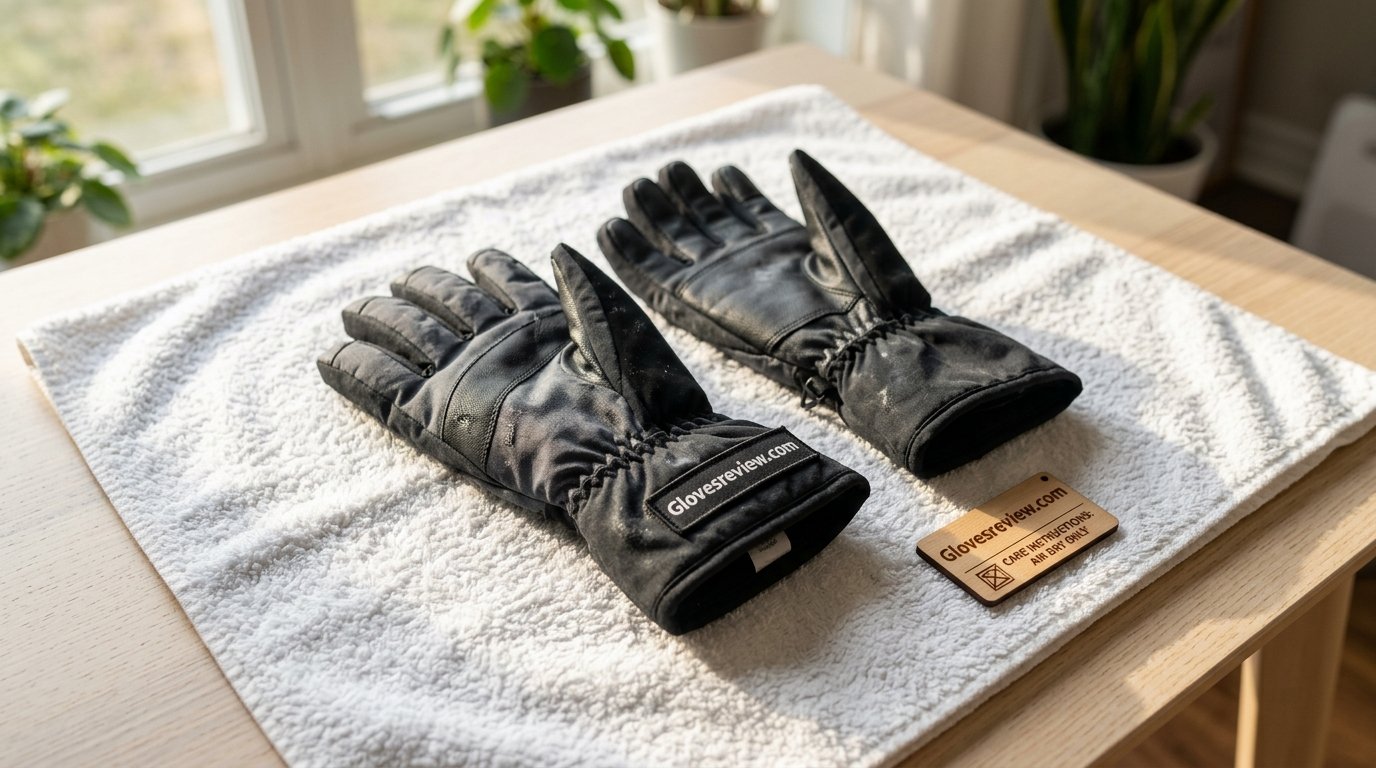
Place gloves flat on a dry towel or a mesh rack with air circulating around them. Turn them every few hours so each side dries evenly. For insulated gloves, open the cuffs wide, and gently pull the liner out if it is removable so it can dry separately. A fan on a low setting a few feet away speeds things up without any heat, which is excellent for thick pairs.
Keep heat away
Radiators, fireplaces, hair dryers, and car heaters feel like shortcuts, but heat shrinks wool, hardens leather, melts glue, and degrades waterproof membranes. Sunlight is gentler but still fades color and dries leather unevenly. Choose a dry, shaded spot with airflow. Expect 12 to 24 hours for thin gloves and up to 48 for heavily insulated pairs.
Check that they are dry all the way through
Squeeze the thickest part of the glove, usually the knuckles and the base of the thumb. If it feels even slightly cool or damp, keep drying. Gloves that go into storage damp will grow mildew. For deeper guidance on getting stubborn dampness out, including the mistakes that cause musty smells, see our guide on how to dry wet gloves.
A folding mesh drying rack lets air reach every side of your gloves.
Shop mesh drying racks on AmazonMachine Washing Winter Gloves: When It Is Safe and How to Do It
Hand washing wins on safety, but some gloves can handle a washing machine, and for a house full of kids’ gloves it is a practical option. The key is to confirm the label allows it and to protect the gloves during the cycle. Machine washing is generally fine for basic fleece gloves, simple knit gloves, and some synthetic-shell gloves. It is risky for leather, down, wool, and anything with a membrane unless the manufacturer explicitly approves it.
Machine-washing steps
- Brush off debris and pre-treat stains as described earlier.
- Close all velcro, zip pockets, and fasten any clips to prevent snagging.
- Place each glove in a zippered mesh laundry bag, or put the pair in a pillowcase tied closed.
- Wash with a few similar light items, not heavy ones like towels or jeans that beat the gloves around.
- Select a delicate cycle, cold water, and the lowest spin speed.
- Use a small amount of mild detergent, and skip fabric softener and bleach.
- Run an extra rinse cycle if the machine has one.
- Remove immediately and follow the shaping and drying steps in this guide.
Dryer or no dryer?
Air drying is always safest. If the label allows tumble drying, use the lowest heat, put the gloves in a mesh bag, and add two or three dryer balls to keep insulation fluffy. Stop while they are still slightly damp and finish by air drying. Dry heat is the most common cause of shrinkage, so avoid the high setting entirely.
Pros of machine washing
- Fast for several pairs at once.
- Consistent, thorough rinsing.
- Useful for kids’ and basic fleece gloves.
Cons of machine washing
- More stress on seams and insulation.
- Unsafe for leather, wool, and many waterproof gloves.
- Harder to control water temperature and spin.
Protect gloves and small items in the machine with zippered mesh bags.
Shop mesh laundry bags on AmazonLeather, Down, Wool, and Waterproof Gloves: Special Care
The general method in this guide works for most gloves, but a few materials deserve their own rules. Mixed-material gloves, which are common in skiing and work gloves, need a blend of these approaches. Always treat the most delicate part first.
Leather gloves
Leather is skin, and soaking it strips natural oils, leaving it stiff, shrunken, and prone to cracking. Never submerge leather gloves. Instead, wipe the surface with a soft cloth dampened with lukewarm water and a drop of leather cleaner or saddle soap. Work in small circles, then wipe again with a clean damp cloth. Let them dry naturally at room temperature while still on your hands or stuffed lightly with paper towels to hold their shape. When fully dry, rub in a thin coat of leather conditioner to restore flexibility. Work-style leather gloves benefit from this once a season, and our roundup of the best winter work gloves notes which leather and synthetic combinations hold up best to repeated cleaning.
Down-filled gloves
Down insulation is wonderful for warmth and fussy about washing. Wet down clumps, and if it never dries completely it can mildew. Hand wash with a down-safe cleaner, press water out gently, and dry thoroughly. If the label permits, tumble dry on the lowest heat with two clean tennis balls or dryer balls, pausing to break up clumps by hand. Expect longer drying times than you think, sometimes a full day.
Wool and wool-blend gloves
Wool shrinks and felts when exposed to heat, agitation, and sudden temperature changes. Use cool water and a wool-specific wash. Press gently, never rub. Rinse in water of the same temperature, press out in a towel, and dry flat. If they shrink slightly, a soak in lukewarm water with a little hair conditioner, followed by gentle stretching, can relax the fibers.
Waterproof and membrane gloves
Most waterproof gloves protect through two things: a membrane inside and a durable water-repellent coating outside. Harsh detergents wear both down. Use a technical wash, rinse thoroughly, and tumble dry on low if the label allows, since gentle warmth can help reactivate the outer coating. If water has started soaking into the face fabric instead of beading, the coating needs a refresh, and the steps in how to waterproof gloves walk you through it. When you are shopping for a replacement, the best waterproof winter gloves guide compares the options that stay protective after repeated washing.
Touchscreen and tech gloves
Conductive fingertips are usually stitched or coated, and aggressive scrubbing wears them out. Dab the fingertips with soapy water, rinse by pressing, and let them dry flat. Avoid vinegar soaks on coated fingertips unless the manufacturer says it is safe.
Kids’ gloves
Children’s gloves get filthy faster than anything else you own, and they often have simple fleece or knit construction that tolerates a delicate machine cycle well. Wash them in mesh bags, check for clips, and dry thoroughly, since damp gloves are a common cause of chapped, irritated hands. Keep a spare pair rotating so one is always dry.
| Glove type | Water | Cleaner | Drying |
|---|---|---|---|
| Leather | Damp cloth only | Leather cleaner or saddle soap | Room temperature, then condition |
| Down | Lukewarm hand wash | Down-safe wash | Low heat with dryer balls, if permitted |
| Wool | Cool hand wash | Wool wash | Flat, no heat |
| Waterproof shell | Cool to lukewarm | Technical wash | Air dry; low tumble if permitted |
| Fleece or knit | Cold hand or delicate machine | Mild detergent | Air dry |
Leather cleaner and conditioner keep leather gloves supple season after season.
Shop leather care on AmazonStorage, Upkeep, and the Mistakes That Ruin Gloves
A good wash only matters if the gloves stay in good shape afterward. A little routine care between washes keeps them cleaner, warmer, and longer-lasting, which means fewer deep cleans and fewer replacements.
Everyday habits that keep gloves fresh
- Air them out every night. Pull the fingers open and set them somewhere with airflow, never in a coat pocket or a closed bag.
- Rotate pairs. Having two pairs lets one dry completely while you wear the other.
- Wipe off salt quickly. A damp cloth after a salty walk prevents buildup.
- Pick up the right pair for the job. Heavy chores and shoveling are tough on thin gloves; see our guide to the best winter work gloves if you want a sturdier option for messy jobs.
- Treat the surface occasionally. A light waterproofing spray after washing keeps the shell shedding water.
Storing gloves between seasons
Make sure the gloves are clean and fully dry, since stored dirt and sweat attract moths and mildew. Loosely stuff the fingers with tissue paper so they hold their shape, then place the gloves in a breathable cotton bag or box with a few cedar blocks. Avoid plastic bags and sealed containers that trap humidity. Keep them in a cool, dark closet instead of an attic or a damp garage.
The most common mistakes
| Mistake | What goes wrong | Do this instead |
|---|---|---|
| Hot water | Shrinks wool, weakens glue, sets stains | Cool to lukewarm water |
| Fabric softener | Coats fibers and clogs membranes | Skip it; use a vinegar rinse |
| Wringing | Twists insulation and tears liners | Press with a rolled towel |
| Radiator or hair dryer drying | Cracks leather, melts adhesives | Slow air drying with airflow |
| Skipping the rinse | Residue attracts dirt and blocks breathability | Rinse until the water runs clear |
| Storing damp | Mildew and odor | Check the thickest parts are fully dry |
| Soaking leather | Stiff, shrunken, cracked leather | Damp cloth and conditioner |
When to wash less and replace more
No cleaning method can fix a glove that has lost its insulation, torn its liner, or worn through its waterproof layer. If your hands are cold even in clean, dry gloves, the loft may be gone. If you are unsure whether a damp glove is a cleaning problem or a protection problem, test it: drip a few drops of water on the shell. Beading means it is working; soaking in means it needs reproofing or replacement. A fit that is too tight also reduces warmth by squeezing the insulation, so if you are buying a new pair, take a look at the best gloves for snow shoveling for sturdy, well-fitting options that handle repeated wet, heavy use.
Troubleshooting: when gloves do not come out right
- Gloves feel stiff after drying: soap or minerals were left behind. Rewash in cool water with a splash of vinegar, rinse well, and let them dry slowly. Flexing the fingers a few times while damp helps loosen the fibers.
- A sour smell returns: the glove probably stayed damp too long or the insulation still holds sweat. Repeat the baking soda or vinegar treatment, then dry with a fan for extra airflow.
- Gloves shrank: relax wool or knit fibers with a lukewarm soak and a little hair conditioner, then ease the fabric back into shape and dry flat. Leather that has shrunk can sometimes be stretched while slightly damp, then conditioned.
- Insulation clumped: wait until completely dry, then gently massage and fluff the clumps by hand. A few minutes in a low-heat dryer with dryer balls helps if the label permits.
- Water no longer beads on the shell: the repellent coating has worn off. Clean the gloves first, then reapply a waterproofing treatment.
- Colors bled: rinse immediately in cold water, then soak briefly in a cold bath with a splash of vinegar. Do not dry the gloves until the water runs clear.
Most of these problems come from heat, haste, or leftover soap, and most can be reversed if you catch them early. If you notice something wrong, stop and fix it before drying, because heat makes every one of these issues harder to correct.
A light spray-on waterproofer helps restore water repellency after washing.
Shop waterproofing sprays on AmazonFrequently Asked Questions About Washing Winter Gloves
Can you put winter gloves in the washing machine?
Sometimes. Basic fleece and knit gloves usually tolerate a delicate, cold cycle inside a mesh bag. Leather, down, wool, and gloves with waterproof membranes are safer hand washed. Always check the care label first.
How often should I wash my winter gloves?
Most everyday gloves need washing two or three times per season. Heavily used or sweaty gloves may need it monthly. Leather gloves need deep cleaning far less often, with occasional wipe-downs between.
What temperature water is best for washing gloves?
Cool to lukewarm, around 30 degrees Celsius or 86 degrees Fahrenheit at most. Hot water can shrink wool, weaken adhesives, and set stains.
How do I get the smell out of winter gloves?
Soak briefly in cool water with a little white vinegar, or sprinkle baking soda inside and leave it overnight before shaking it out. Then wash and dry thoroughly, since lingering dampness brings the odor back.
Can I wash leather winter gloves?
Not by soaking. Clean them with a damp cloth and a small amount of leather cleaner, let them dry at room temperature, and then apply a leather conditioner.
Will washing ruin the waterproofing on my gloves?
Harsh detergents and fabric softener can. Use a technical wash, rinse well, and dry on low heat if permitted. If water stops beading afterward, reapply a waterproofing treatment.
Can I use fabric softener on gloves?
No. Softener coats fibers, reduces insulation and moisture-wicking, and can clog waterproof membranes. A splash of white vinegar in the rinse is a better option.
Can I put winter gloves in the dryer?
Only if the label allows it. Use the lowest heat in a mesh bag with dryer balls and stop while slightly damp. Air drying is always the safest choice.
How long do winter gloves take to dry?
Thin gloves dry in about 12 to 24 hours. Thick insulated or down gloves can take up to 48 hours. Make sure the knuckles and thumb base feel completely dry before storing them.
How do I stop gloves from shrinking in the wash?
Use cool water, avoid wringing and heat, and dry flat. If wool gloves shrink slightly, soaking in lukewarm water with a little hair conditioner and gently stretching can help.
Can I wash gloves with touchscreen fingertips?
Yes, gently. Dab the fingertips instead of scrubbing, rinse by pressing, and dry flat so the conductive thread does not wear out.
Should I wash gloves before wearing them the first time?
Usually no. New gloves are ready to wear, and an unnecessary wash only wears on the waterproofing. Follow the care label if the manufacturer recommends a first wash.
Conclusion: Clean Gloves Are Warmer Gloves
Washing winter gloves is not complicated, but it does reward patience. Read the care label, brush off the grit, pre-treat stains, wash gently in cool water, rinse until the water is clear, press out moisture with a towel instead of wringing, and dry slowly with plenty of airflow. Follow those seven steps and your gloves will come out fresher, softer, and just as warm as before.
The materials matter most. Leather needs a damp cloth and conditioner, wool needs cool water and a flat dry, down needs patience, and waterproof gloves need a technical wash. When in doubt, choose the gentlest option. A glove that has been treated well can easily last for many winters, while one that has been washed too hot or dried too fast can be ruined in a single afternoon.
Finally, build a few habits around your gloves: air them out nightly, rotate pairs, wipe off salt, and store them clean and fully dry. Those small steps mean fewer deep cleans and happier hands all season.
Ready to freshen up your winter gear? Start with the right cleaner and care supplies.
Shop glove care supplies on Amazon