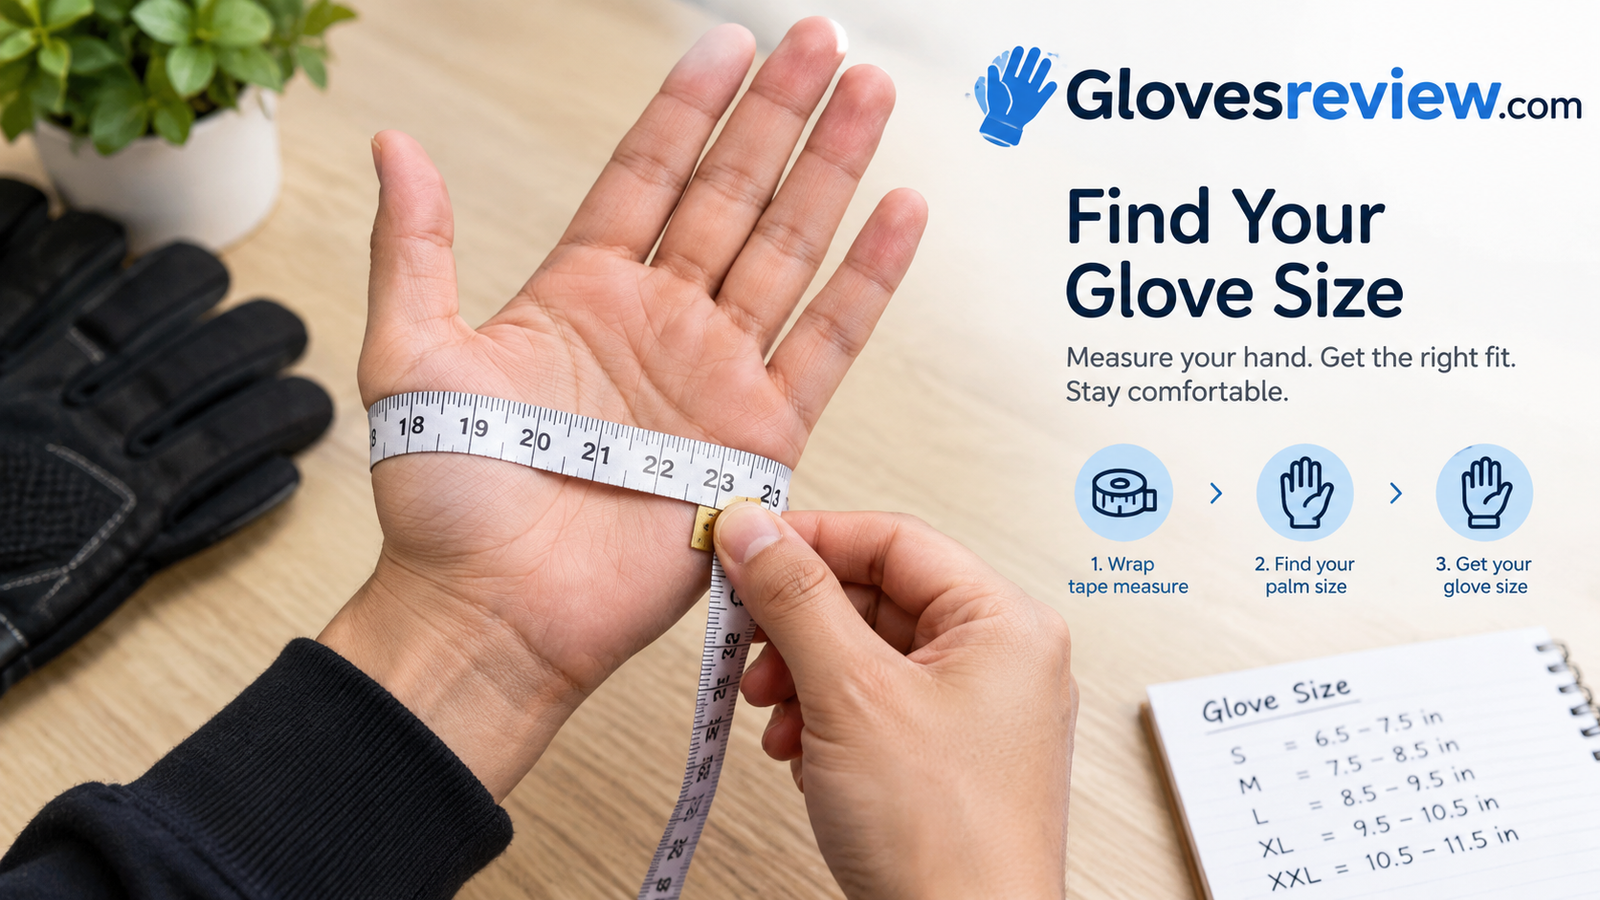
How to Measure Hand Size for Gloves: The Complete, Step-by-Step Fitting Guide
Learn exactly where to place the tape, which numbers matter, and how to turn them into a glove size that actually fits, whether you are buying for winter, work, or everyday wear.
Most people pick gloves the way they pick socks: grab the size that sounds right and hope for the best. Sometimes that works. Plenty of the time you end up with fingertips that fold over at the ends, a palm that bunches when you make a fist, or a cuff that gaps at the wrist and lets cold air in. A tape measure and about five minutes can prevent all of it.
This guide walks through the whole process from start to finish. You will learn which measurements matter, where exactly to place the tape, how to record the numbers, and how to translate them into a size on any brand’s chart. There are seven clear steps, each with a diagram so you can see what is happening. If you do not own a tape measure, there are two backup methods using things you already have at home.
Nothing here requires special skill. If you can wrap a strip of tape around your hand and read a number, you can get a precise glove size. Let’s start with why it is worth doing properly.
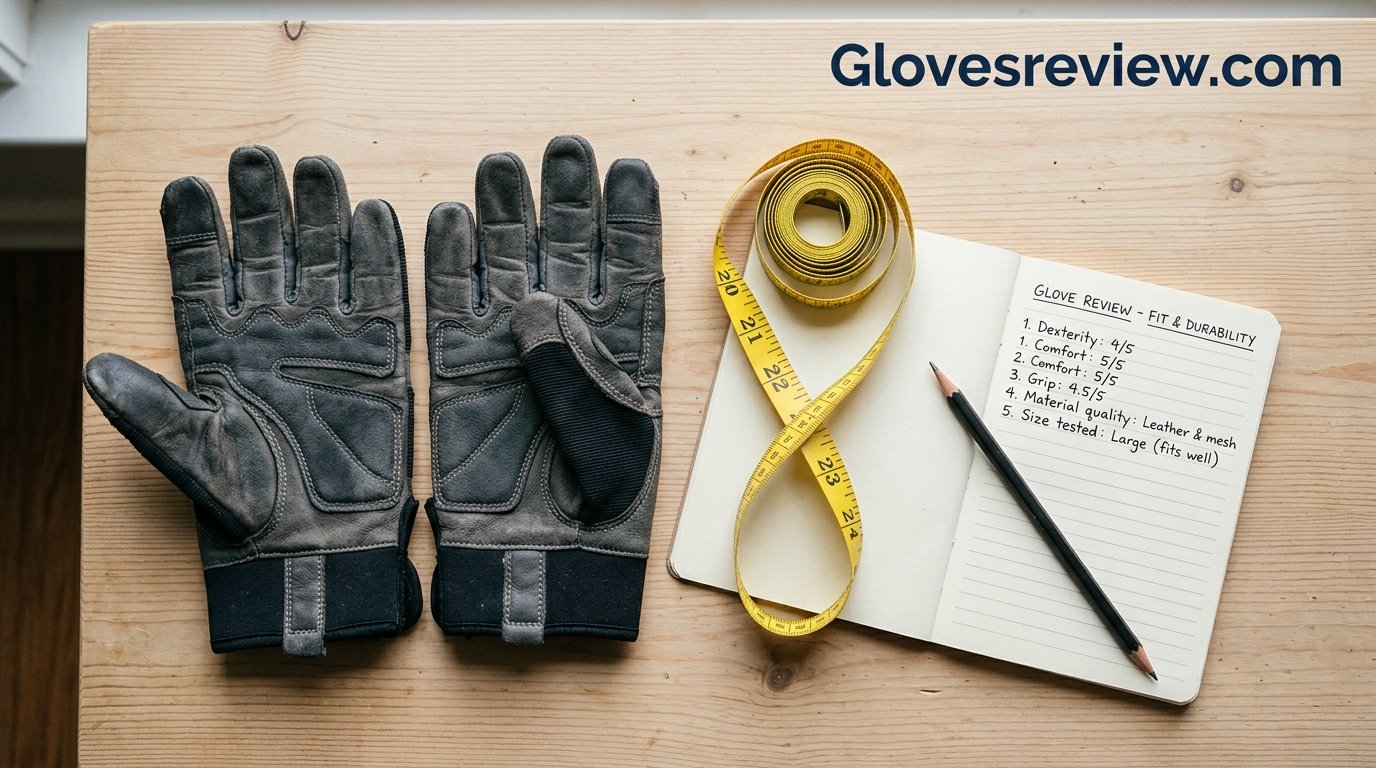
Why Getting Your Hand Measurement Right Changes Everything
A glove is a close-fitting tool. Unlike a jacket or a sweater, it has to match a part of your body that bends, grips, flexes and spreads, all while keeping the right amount of space around each finger. A size that is off by even half an inch can change how it performs.
Warmth depends on fit
An insulated glove keeps your hands warm by trapping a thin layer of air around the skin. If the glove is too tight, it squeezes that insulation flat and slows circulation to your fingers, which makes cold hands colder. If the glove is too loose, the air layer is too big to warm up, and heat escapes every time you move. The best winter fit sits in between: snug enough that the insulation touches your hand, loose enough that blood can flow freely and your fingertips have a little breathing room.
Dexterity and grip
For work gloves, driving gloves and cycling gloves, fit is mostly about control. Loose fabric at the fingertips makes it hard to pick up small items, press buttons, or feel what you are holding. Excess material in the palm bunches under your grip and creates pressure points that become blisters. A properly sized glove moves with your hand instead of fighting it.
Durability and safety
Gloves that are too tight stress their seams every time you close your hand. The stitching around the thumb and between the fingers is usually the first thing to fail. Gloves that are too loose can catch on equipment, snag on branches, or slide when you need to hold on. In some jobs that is not just annoying, it is a real risk.
The cost of guessing
Returns, exchanges and gloves that stay in a drawer all cost money. A pair that does not fit will not get worn, so measuring once and saving the numbers is cheap insurance. Better still, your measurements do not change much from year to year, so you can reuse them every time you shop.
Quick takeaway: Fit affects warmth, grip, comfort and how long the gloves last. Measuring takes minutes and you only have to do it once.
Fit is personal, but the principles are universal
It helps to think of a glove as a second skin with a job to do. In a snowstorm that job is staying warm. On a job site it is protecting you while letting you feel what you are holding. On a bike it is cushioning vibration while keeping your grip secure. In every case the same basic rule applies: the glove should be as close to your hand as possible without limiting movement or blood flow. Measuring is simply the most reliable way to find that balance before you spend any money, rather than after.
It also helps you read reviews more intelligently. When a reviewer says a glove runs small, you can compare their comment with your own numbers instead of wondering whether their hands are bigger than yours. Once you know your palm circumference and hand length, advice from other buyers turns from vague opinion into useful data.
Browse a wide range of styles and check each size chart against your numbers.
The Tools You Need (and the Ones You Can Skip)
The good news is that this job needs almost no equipment. A few simple items will do, and you probably have most of them already.
The essentials
- A flexible tape measure. A soft sewing or tailor’s tape is ideal because it wraps around the curve of your hand. A rigid metal tape tends to lift away from the skin and gives readings that are too large.
- A rigid ruler. Useful for measuring straight lengths, and for the string method described later.
- Pen and paper, or a notes app. Write down every number right after you take it, along with the hand you measured.
- A flat table. Resting your hand on a hard surface keeps it steady and relaxed.
Helpful extras
- A helper. You can measure yourself, but a second person makes the length measurements much easier, since you can hold the tape taut while your hand stays still.
- A pencil or washable marker. For marking the wrist crease or finger base if you are using the paper method.
- A piece of string or a strip of paper. Your backup if no soft tape is available.
- A phone camera. Snap a quick photo of the tape in place, so you can double-check the reading afterward.
What to skip
Do not use a metal construction tape measure around your hand unless you have nothing else. It will not hug the curve and will usually push your measurement higher. Avoid measuring over a bulky ring, a watch or a bandage too. Take off anything that sits on the hand or wrist.
Best time to measure
Hands swell a little after a long day, after exercise and in hot weather, and shrink slightly when cold. For the most reliable reading, measure when your hands are at room temperature and relaxed, not right after a workout or a bitterly cold walk. If you are unsure, measure once in the morning and once in the evening and use the larger of the two.
Tip: A flexible tape costs only a few dollars and lasts for years. It is worth owning if you also buy shirts, hats or rings online.
A flexible tailor’s tape is the right tool for the job and it is inexpensive.
The Four Key Measurements That Decide Your Glove Size
You will see a lot of advice online that says “just measure around your palm.” That is the most important number, but it is not the only one. Using all four measurements gives you a much better chance of getting a glove that fits your fingers as well as your palm.
| Measurement | Where it is taken | What it tells you |
|---|---|---|
| Palm circumference | Around the widest part of the palm, just below the knuckles, not including the thumb | Your base glove size on almost every chart |
| Hand length | From the crease at the base of the palm to the tip of the middle finger | Whether the glove body is long enough, and whether you need regular or long sizing |
| Middle finger length | From the base of the middle finger to its tip | Whether your fingertips will reach the end of the glove fingers without folding |
| Palm width | Straight across the palm at the knuckle line, without the thumb | Fit across the hand, helpful for wide or narrow palms |
Which one matters most?
Palm circumference is the number most size charts use first, so measure it with extra care. Length is the number that most often explains why a glove that fits around the palm still feels wrong, usually because the fingers are too short or too long for the person’s hand. If a brand lists both, it is a sign they care about fit and you can trust their chart more.
Why two numbers beat one
Imagine two people who both measure 8.5 inches around the palm. One has short, broad hands and the other has long, narrow ones. The same glove cannot fit both well. Palm circumference gets you into the right size range, and length tells you whether you sit at the shorter or longer end of it. When you are between sizes, length usually settles the decision.
Which hand?
Most people have one hand that is slightly larger, often the dominant one. Measure both and record each. For most shopping, use the larger measurement. We cover this in step 6.
Units
Glove charts use inches in the US and centimeters in most other places. Write down both if you can. One inch equals 2.54 centimeters, so 8 inches is about 20.3 centimeters.
How these measurements relate to each other
Hand proportions vary more than most people expect. In many adults, the middle finger is roughly 40 to 45 percent of total hand length, but plenty of people sit outside that range. That is exactly why a single “medium” cannot fit everyone who measures the same around the palm. If your finger is proportionally longer, you will usually feel it as pressure at the tips. If your palm is proportionally wider, you will feel it as tightness across the back of the hand or a seam that cuts in at the base of the little finger.
Keeping all four numbers on file means you can look at any size chart and quickly tell which dimension is most likely to cause trouble for you. Over time you will notice patterns, such as always needing the long fit in one brand and the regular fit in another, and that knowledge saves a lot of trial and error.
Look for listings that include both circumference and length in the size chart.
Steps 1 and 2: Position Your Hand and Measure Palm Circumference
Step 1Rest your hand flat and relaxed
Sit at a table and place your hand palm-up or palm-down on a flat surface, whichever you find easier. Keep your fingers together but not stiff, with the thumb relaxed against the side. Do not clench, and do not stretch your fingers apart as far as they go. A neutral, natural position gives the most realistic measurement.
Remove rings, watches and bracelets. Check that your sleeve is pushed up past the wrist so the tape can move freely.
Neutral posture: fingers together, nothing clenched or stretched.
Step 2Wrap the tape around the widest part of your palm
Take the soft tape and wrap it around your palm just below the base of your fingers, at the knuckle line. This is the widest part of the palm. Leave your thumb out of the loop entirely, with the tape passing across the web of skin between thumb and index finger.
The tape should be snug but not tight. A good test: you should be able to slide one fingertip under the tape without effort, but the tape should not droop or slide. Read the number where the end of the tape meets the zero mark. Write it down, and repeat once more to confirm.
Do not pull hard. Pressing the tape into the skin gives a number that is too small, and you may end up with gloves that squeeze and cut off warmth.
The tape sits just below the knuckles and skips the thumb.
Match it to the size chart on any glove you like, then shop with confidence.
Steps 3 and 4: Measure Hand Length and Middle Finger Length
Circumference gets you into the right size range. Length tells you whether the glove will actually cover your fingers properly. These two measurements are the ones most people skip, and they are the reason many “correct” sizes still feel wrong.
Step 3Measure from wrist crease to the tip of the middle finger
Hold your hand flat with the palm facing up and the fingers together. Find the crease where your palm meets your wrist, the lowest line on the palm side. Place the zero end of the tape or ruler on that crease. Run it straight up the center of the palm and along the middle finger, ending at the very tip.
Keep the tape straight and avoid following the slight curve of the palm. A helper makes this far easier, but you can also lay a ruler on a table and rest your hand beside it. Record the length in inches and centimeters.
One straight line along the middle finger, from crease to tip.
Step 4Measure the middle finger on its own
Now measure just the middle finger. Place the tape at the base of the finger, where it joins the palm on the palm side, and run it along the inside of the finger to the tip. This number tells you how much room your longest finger needs inside the glove.
It is easy to find the base: bend the finger and look for the crease where it folds against the palm. Measure from that crease to the end of the fingertip. Some brands, particularly those making work and sport gloves, list finger length in their charts. If they do, this number is exactly what they want.
The middle finger is usually the longest, so it decides fingertip room.
Rule of thumb: If your hand length is near the top of a size range, choose the larger size even if your circumference sits at the bottom of the range. Fingertips need room.
Many brands offer regular and long fits so your fingertips are not squeezed.
Steps 5 and 6: Measure Palm Width and Compare Both Hands
Step 5Measure across the palm
Palm width is the straight-line distance across your palm at the knuckle line. It is not the same as circumference, since it does not wrap around the hand. It simply tells you how broad your palm is.
Lay your hand flat. Place a ruler or the tape across the widest part of the palm, from the outer edge of the index finger’s base to the outer edge of the pinky’s base. Leave the thumb out. Read the number at both edges without letting the ruler tilt.
This measurement is particularly useful for anyone who finds that gloves are tight across the knuckles but long enough in the fingers, or the other way round. Wide palms often need a different cut than a simple size increase provides.
A straight ruler line, edge to edge, with the thumb left out.
Step 6Repeat on the other hand and compare
Now repeat steps 2 through 5 on your other hand. It is very common for one hand to be a little larger than the other, usually by a few millimeters. For most people the difference is too small to matter. For some, it is enough to change the size choice.
Record your results in a simple table like this:
| Measurement | Left hand | Right hand | Use |
|---|---|---|---|
| Palm circumference | __ in / __ cm | __ in / __ cm | Larger number |
| Hand length | __ in / __ cm | __ in / __ cm | Larger number |
| Middle finger | __ in / __ cm | __ in / __ cm | Larger number |
| Palm width | __ in / __ cm | __ in / __ cm | Larger number |
When you shop, use the larger of the two numbers. A glove that is slightly roomy on your smaller hand is far more comfortable than one that pinches the bigger one.
Example numbers only. Always shop with your larger hand’s measurements.
Now you are ready to pick a pair that suits both hands.
Turn Your Numbers Into a Glove Size
You now have the data. This step is about reading it correctly. Glove sizing is not fully standardized, so the same hand can be a medium in one brand and a large in another. That is why you should always compare your measurements with the chart for the specific glove you are buying, rather than relying on the letter alone.
As a starting point, here are typical ranges. They are approximations, not promises, so treat them as a way to know roughly where you land.
General size guide for women
| Size | Palm circumference (in) | Palm circumference (cm) |
|---|---|---|
| XS | 6 – 6.5 | 15 – 16.5 |
| S | 6.5 – 7 | 16.5 – 18 |
| M | 7 – 7.5 | 18 – 19 |
| L | 7.5 – 8 | 19 – 20.5 |
| XL | 8 – 8.5 | 20.5 – 21.5 |
General size guide for men
| Size | Palm circumference (in) | Palm circumference (cm) |
|---|---|---|
| S | 7.5 – 8 | 19 – 20.5 |
| M | 8 – 9 | 20.5 – 23 |
| L | 9 – 10 | 23 – 25.5 |
| XL | 10 – 11 | 25.5 – 28 |
| XXL | 11 – 12 | 28 – 30.5 |
Using length to settle close calls
If your circumference lands right on the boundary between two sizes, look at your hand length. Short for the range? Go with the smaller size. Long for the range? Go with the larger. This is the single most useful trick in glove shopping and it works across nearly every brand.
Numeric and unisex sizing
Some brands use numbers (6, 7, 8, 9, 10) that roughly correspond to palm circumference in inches. Others use unisex letters, which tend to run large for women and small for men with very broad hands. If a chart lists both circumference and length, trust the numbers over the letter every time.
Always check the brand chart. If a listing does not include one, look at reviews for comments such as “runs small” or “true to size” and adjust accordingly.
An illustrative example. Your brand’s chart may use different ranges.
Check the chart on the listing, then choose the row that matches both numbers.
No Tape Measure? Two Reliable Workarounds
If you do not have a soft tape, you can still get accurate numbers. These two methods both use household items and give results close to the real thing.
Method B: String (or thread) and ruler
B1Wrap the string around your palm. Use a piece of string, a shoelace, a phone charger cable or a strip of paper. Wrap it once around the widest part of your palm at the knuckle line, skipping the thumb. Pinch the point where the end meets the rest of the string.
B2Lay the string along a ruler. Straighten the string against a ruler or the edge of a flat tape measure, without stretching it. The distance from the start of the string to your pinch mark is your palm circumference. Do the same for the other hand.
Method C: Paper trace
C1Trace your hand on paper. Place your hand flat on a sheet of paper with the fingers together and the thumb relaxed. Trace around the outside of the hand with a pencil, holding the pencil upright so the outline is not wider than your real hand. Mark the wrist crease as well.
C2Measure the drawing. Take your hand away and use a ruler on the paper. Measure the width of the palm outline at the knuckle line, and the length from the wrist crease to the tip of the middle finger. Because a tracing is flat, circumference is roughly twice the width plus a little extra, so for a rough size, multiply palm width by about 2.1 to estimate palm circumference.
A note on accuracy: The paper method is the least precise of the three. Use it to find your general range, and then pick the size that matches your closest numbers.
Stretchy glove styles are forgiving if your measurement is on the edge.
Sizing by Glove Type: Why Winter, Work and Sport Gloves Fit Differently
Your hand measurements stay the same, but the ideal fit changes depending on the glove. A pair for shoveling snow should feel different from a pair for driving. Here is how to adjust.
| Glove type | Ideal fit | Size guidance |
|---|---|---|
| Insulated winter | Snug palm, a little fingertip room | Use your measured size, or go up if you plan to wear liners |
| Waterproof | Fitted, but never tight | Membranes do not stretch, so avoid a snug fit |
| Work and utility | Close but flexible | True to size, since looseness causes bunching and snags |
| Leather dress and driving | Very close | Often one size smaller, since leather stretches with wear |
| Cycling and sport | Minimal extra material | Measured size, possibly tight at first |
| Gardening | Snug for dexterity | True to size; avoid roomy styles with thorns |
| Ski and snowboard | Roomy fingers, snug wrist | True to size, or up for layered liners |
Winter and waterproof gloves
Insulated gloves need space, but not too much. If you plan to wear a thin liner underneath, consider sizing up. For example, if you are on the line between M and L, a larger size makes sense when layering. For shopping inspiration, our guide to the best waterproof winter gloves covers pairs that balance warmth with comfortable fit, and the roundup of the best gloves for snow shoveling highlights options with the grip and room you need for repetitive work.
Work gloves
Work gloves are where measuring really pays off. Extra material in the fingers is a hazard around moving equipment, and a tight glove stops your hand from moving naturally. Stick to your measured size and look for gloves with good finger articulation. If you need cold-weather protection on the job, see our picks for the best winter work gloves.
Pros of sizing carefully
- Better warmth and circulation
- Stronger grip and control
- Longer glove lifespan
- Fewer returns and wasted money
Cons to be aware of
- Takes a few extra minutes
- Brand charts can differ
- Leather may need a break-in period
Leather and driving gloves
Leather loosens with wear. A new leather glove should feel snug, almost slightly tight across the knuckles, because it will relax by roughly half a size after a few weeks of use. Do not buy leather gloves that feel perfect right away unless you want them to end up loose.
Sport and cycling
Cycling gloves rely on precise fit, since seams on the palm can rub as you grip handlebars. Pick your measured size and check whether the cuff is meant to be snug. Moisture-wicking fabrics generally stretch less than knits, so a small difference in size matters more.
Material changes the rules too
Fit also depends on what the glove is made of. Knit and fleece gloves have the most give, so they are the most forgiving if your numbers fall between sizes. Synthetic shells with waterproof membranes have very little stretch, so they need to be sized correctly from the start. Leather stretches but only in certain directions, usually across the knuckles and fingers rather than along the length. Neoprene and rubber-coated gloves tend to feel tight when new and stay that way, so choose them true to size rather than hoping they will loosen.
Pre-curved fingers are another feature worth noticing. Gloves with a natural curve match the resting shape of your hand, which cuts down on bunching in the palm. If you spend hours gripping a tool or handlebar, this design can be more important than the exact size, so it is worth including in your search.
Compare insulated, waterproof and work styles in your size.
Common Hand-Measuring Mistakes (and How to Fix Them)
Most bad measurements come from a handful of avoidable errors. Check this list before you trust your numbers.
Pulling the tape too tight
This is the most common error. A tight tape compresses the skin and produces a number that is too small, which leads to gloves that squeeze. Keep the tape snug, but never pressed in. If the tape leaves a mark on your hand, you have pulled too hard.
Including the thumb in the loop
The thumb is not part of the standard palm circumference. Including it adds a lot of length and puts you in the wrong size entirely. Keep the tape across the web of skin between thumb and index finger.
Measuring at the wrong spot
Measure at the knuckle line, which is the widest part of the palm. Measuring lower, closer to the wrist, tends to give a smaller result, and measuring over the knuckles themselves gives a larger one.
Using a rigid tape measure
A stiff metal tape cannot hug the hand and pushes your reading up. If a soft tape is not available, use string and a ruler instead.
Measuring one hand only
Many people have a slightly larger dominant hand. Measure both, and use the larger.
Measuring when your hands are swollen or cold
Heat, exercise and long days all make hands swell a bit, while cold shrinks them. Aim for a relaxed, room-temperature reading, or check at two different times of day.
Ignoring length
Circumference alone does not tell you if the fingers will be long enough. Always note hand length too, especially if your fingertips often feel cramped.
Trusting the letter on the tag
Brands vary widely. A medium from one maker can be a large from another. Measure against the chart and, when in doubt, read reviews. If you also care about care and shrinkage, our advice on how to wash winter gloves explains how to keep fit consistent after cleaning.
Double-check: Measure twice, write down both readings, and if they differ by more than a quarter inch, measure a third time.
Find a pair that suits your updated numbers.
Fit Testing, Liners and What to Do When You Are Between Sizes
Once your gloves arrive, a short test will confirm whether your measuring paid off.
The 60-second fit test
- Put both gloves on fully. Push each finger all the way to the end.
- Make a fist. The material should stretch smoothly with no strong pull across the knuckles.
- Spread your fingers. There should be no sharp tightness between them.
- Check the fingertips. You want a little space, about the width of a pencil eraser, but no loose, flopping material.
- Pinch and grip. Pick up a coin or a pen. You should be able to do it without struggling.
- Check the cuff. It should close comfortably around the wrist and stay in place when you raise your arms.
Wearing liners
If you plan to wear thin liners under your gloves in very cold weather, try them together before you decide on a size. A glove that fits well alone may feel tight with a liner, and liners can compress insulation if the outer glove is too small. To learn what kind of insulation or lining suits you, read our comparison of Thinsulate vs fleece gloves.
When you land between two sizes
Use this quick decision guide:
- Insulated or waterproof gloves: go up. Space helps warmth and prevents compression of the lining.
- Leather gloves: go down. Leather will relax with wear.
- Knit or stretch gloves: either works, so go with your preference for fit.
- Work gloves: pick based on hand length. Longer fingers mean larger, shorter fingers mean smaller.
Keeping hands warm is about more than size
A perfectly sized glove still depends on dry layers, good circulation and wise habits. If you spend time outside in freezing temperatures, take a look at our tips on how to keep hands warm in extreme cold. Proper fit is the foundation, but it works best alongside the right layering.
Returns and exchanges
Test gloves indoors first, keep tags on, and keep your measurement notes so you can pick the next size quickly if you need to exchange.
Break-in time and what is normal
A new glove always feels a little different from an old, worn-in one. Stiff leather, new seams and fresh insulation can all feel slightly tight for the first few days. That is normal and is not a sign you measured wrong. What is not normal is numbness, a pinching sensation, or fingertips that go cold faster than usual. Those are signs the glove is too small, and the better fix is to exchange it rather than hoping it will relax.
The opposite problem is just as telling. If you can pinch more than about half an inch of extra material at the tip of any finger, or if the glove slides down when you raise your hand, it is too big. Loose gloves lose heat quickly and make it harder to control tools, so it is worth swapping them for a smaller size as well.
Thin liners work well under many mid-weight gloves.
Special Cases: Kids, Small Hands, Large Hands, Wide Palms and Long Fingers
Not every hand fits the standard chart. Here is how to handle the most common exceptions.
Measuring kids
Children’s hands grow fast, so you will need to re-measure each season. Use the same method: palm circumference, hand length, and palm width. Kids are often squirmy, so try wrapping a strip of paper around their palm and measuring that later. When in doubt, choose a size with a little extra room, since a child’s glove should leave a little space at the fingertips without being so big that they fall off. Gloves with adjustable cuffs are a good fit for growing hands.
Small hands
Adults with small hands often fall below a standard women’s XS or men’s S. Look for women’s, youth or petite sizing. Youth sizes can be a great fit for smaller adults, particularly for winter and work gloves.
Large hands
If your measurements are at the top of the chart, look for brands that offer XXL, XXXL or tall sizes. Many work-glove makers go far above the standard range. Avoid squeezing into the biggest size you can find, because over-stretched gloves wear out quickly.
Wide palms with short fingers
Your circumference suggests a larger size, but your length suggests a smaller one. Choose the larger size for width and look for gloves with adjustable cuffs or stretch panels. Gloves from brands that use a more anatomical cut may serve you better than basic patterns.
Narrow palms with long fingers
The reverse is also common: a small circumference and long fingers. Size up for length and choose gloves with an adjustable wrist closure to keep the palm secure.
Comfort-first fits
Some people, including those who prefer extra space for comfort or those who wear gloves for long periods, like a slightly more relaxed fit. If that is you, pick your measured size or one size above and favor stretchy materials rather than rigid ones.
Remeasure over time
Hand size is fairly stable in adulthood, but it can change slightly with age, weight changes, or activity. A quick check every year or two keeps your notes accurate. Save your numbers in your phone and you will never need to guess again.
Gloves for different activities, same measurements
Whatever the situation, your measurements are your reference. If you take up a new sport, start a new job, or buy gloves as a gift, the first step is always the same: compare your numbers with the chart, then adjust for the way the glove will be used. Buying as a gift is trickier, since you cannot measure the recipient’s hands directly. If you can, ask them to measure using the steps in this guide, or choose a stretchy style with some tolerance. A gift receipt is always a good idea.
It is also worth keeping a short note of what worked in the past. Write down brand, size and any comments like “tight at the fingertips” or “roomy in the palm.” That small record builds up into a personal fit guide that is more valuable than any generic chart.
Find kids’ gloves in sizes measured to fit.
Frequently Asked Questions About Measuring Hand Size for Gloves
How do I measure my hand size for gloves?
Wrap a soft tape measure around the widest part of your palm, just below the knuckles and without including the thumb. Then measure from your wrist crease to the tip of your middle finger. Compare both numbers with the size chart of the glove you want to buy.
Which hand should I measure?
Measure both. Most people have one hand that is slightly larger, often the dominant one. Use the larger measurement when you shop so the gloves are comfortable on both hands.
Should the tape be tight or loose?
It should be snug but not tight. You should be able to slide one fingertip under the tape. If the tape digs into your skin, you are measuring too small.
How do I measure my hand without a tape measure?
Wrap a piece of string or a strip of paper around your palm, mark where it overlaps, and measure the string against a ruler. You can also trace your hand on paper and measure the outline.
What size glove is a hand that measures 8 inches around?
On most general charts, 8 inches around the palm is a women’s large or a men’s small to medium. Brands differ, so check the specific size chart for the glove you plan to buy.
Should I size up or down if I am between sizes?
For insulated and waterproof gloves, size up so the insulation does not get compressed. For leather gloves, size down, since leather loosens with wear. For work gloves, use your hand length as the tiebreaker.
Do men’s and women’s glove sizes differ?
Yes. Women’s gloves usually have narrower palms and slimmer fingers, while men’s gloves are wider and often longer. Unisex sizing varies by brand, so rely on your measurements rather than the label.
How should gloves fit?
Gloves should feel snug across the palm, with a small amount of room at the fingertips, no pulling when you make a fist, and a cuff that stays in place. They should never restrict blood flow or leave deep marks on your skin.
How do I measure a child’s hand for gloves?
Use the same steps as for adults. If a child will not hold still, wrap a strip of paper around the palm and measure it afterward. Leave a little growing room, and re-measure each season.
Does my hand size change over time?
It changes very little in adulthood, though swelling, weight changes and age can shift it slightly. Check again every year or two and keep your numbers in your phone for easy shopping.
Do I need to size up for liners?
If you plan to wear liners regularly, try them on with the outer gloves before deciding. A size up is often a good choice for insulated gloves so the liner does not compress the insulation.
How accurate are online glove size charts?
They are a good starting point, but accuracy varies by brand. Compare your palm circumference and hand length with the chart, and read reviews for comments about whether the gloves run small or large.
Conclusion: Measure Once, Buy Right Every Time
Learning how to measure hand size for gloves is one of those small jobs that pays off for years. With a soft tape measure, a few minutes and the seven steps in this guide, you can capture four numbers that tell you almost everything a size chart needs: palm circumference, hand length, middle finger length and palm width. Record both hands, use the larger values, and compare them with the brand’s own chart rather than the letter on the tag.
Remember the practical adjustments. Size up for insulated and waterproof gloves, size down slightly for leather, and use hand length to settle any close call. Fit test every new pair indoors before wearing them out, and keep your measurement notes handy in case you want to exchange. Once you have your numbers, shopping for any glove becomes faster and far more reliable.
Take a moment right now to write your measurements into your phone. The next time cold weather, a work project or a new hobby sends you shopping, you will know exactly what to look for.
Take your measurements to the store and compare options in your size.
You may also like
How to Dry Wet Gloves
Get soaked gloves warm and ready again quickly without damaging the lining or shrinking the fit.
Waterproof vs Water-Resistant Gloves
Understand the real difference so you can pick the right level of protection for your weather.
How to Waterproof Gloves
Simple methods to restore water protection and extend the life of the pair you already own.