
How to Dry Wet Gloves Fast Without Ruining Them
Soaked leather, insulated, fleece and work gloves all dry differently. Here is the safe, step-by-step way to get yours warm, soft and ready to wear again.
Why Wet Gloves Need More Care Than You Think
You come in from the cold with fingers that barely feel like yours, peel off a pair of soaked gloves, and drop them on the nearest radiator. It feels like the sensible thing to do. Unfortunately, it is also one of the quickest ways to shorten the life of a good pair. Heat applied too hard and too fast cracks leather, melts glue, shrinks wool and warps the waterproof membranes that were keeping your hands dry in the first place.
Learning how to dry wet gloves properly is really about balancing three things: speed, safety and hygiene. You want the gloves dry quickly enough that they are ready for tomorrow, but not so quickly that the materials suffer. You also want the moisture gone from deep inside the insulation, because a glove that feels dry on the outside can still hold a surprising amount of water in the liner, the fingertips and the seams.
What actually happens when a glove stays wet
Water does more than make a glove uncomfortable. Wet insulation loses much of its ability to trap warm air, which is why damp gloves feel colder than no gloves at all after a few minutes outside. Left in a ball in a bag or on a cold garage floor, moisture also feeds bacteria and mildew. That is where the stale, sour smell comes from, and once it sets into a lining it can be stubborn to remove.
Leather suffers in a different way. Soaked leather swells, and as it dries unevenly it can stiffen, shrink and crack along the knuckles. Synthetic shells fare better, but the seams, adhesives and tapes that keep them waterproof can be damaged by high heat. Even a technical glove with an expensive membrane is only as good as the care it gets between outings.
The three rules behind every method in this guide
- Remove water mechanically first. Squeezing and towel-pressing takes out far more moisture than any heat source can in the same time.
- Move air, don’t blast heat. Steady airflow around and inside the glove dries it evenly. Gentle warmth helps, but airflow does most of the work.
- Respect the material. Leather, down, wool, fleece, rubber and membrane gloves each have limits. A quick check of the care label saves a lot of regret.
Whether you are coming off a snowy driveway after a round of shovelling (our guide to the best gloves for snow shoveling covers what to wear for it), a rainy commute, a ski day or a muddy job site, the same logic applies. The rest of this guide walks you through it in seven clear steps, then covers each glove type, the mistakes to avoid and the small habits that keep gloves from getting soaked in the first place.
Squeeze out the water, press the gloves between towels, open them up and pull out any removable liners, then let them dry in moving air at room temperature or with gentle, low warmth. Keep them away from direct heat, stuff the fingers with dry paper or cloth if you need to hurry, and make sure they are completely dry inside before you wear or store them.
Know Your Glove: Material Matters Before You Dry
Before you reach for a towel or a heat source, take ten seconds to identify what your gloves are made of. The right method for fleece is the wrong method for leather, and the right method for a rubber-dipped work glove is the wrong one for a down-filled mitt. Most gloves carry a care label inside the cuff, and that label always beats general advice, including ours.
If the label has worn off, use the material itself as a guide. Smooth or suede animal hide is leather. A slick, stretchy outer with a soft inner is usually a polyester or nylon shell with fleece or synthetic insulation. A glove with a coated palm is typically a work or gripping glove. Knitted gloves are wool, acrylic or a blend, and anything puffy with sewn baffles may be down or a synthetic fill.
Drying tolerance by material
| Material | Heat tolerance | Best drying approach | Biggest risk |
|---|---|---|---|
| Leather and suede | Very low | Slow air drying, away from heat, reshape by hand | Shrinking, stiffness, cracking |
| Synthetic shell with fleece | Low to moderate | Air drying with airflow or gentle warmth | Melted adhesives, damaged membrane |
| Insulated ski or snow gloves | Low | Remove liners, dry separately, use a glove dryer | Trapped moisture in the insulation |
| Wool and knits | Low | Press in a towel, dry flat, reshape | Felting, shrinking, stretching |
| Down-filled | Low | Air dry then fluff, low tumble only if the label allows | Clumping, mildew inside baffles |
| Rubber, nitrile or coated work gloves | Very low | Turn inside out where possible, air dry | Coating cracking or peeling |
| Fleece and thin liners | Moderate | Air dry, or low tumble if the label allows | Matting, pilling |
Waterproof, water-resistant and why it affects drying
The way a glove resists water changes how it gets wet and where the water hides. A truly waterproof glove with a membrane keeps water out, but once water gets in through the cuff it has a hard time getting back out, so the inside can stay damp long after the outside feels dry. A water-resistant glove soaks through eventually but also releases moisture more readily. If you are still deciding between the two, our breakdown of waterproof vs water-resistant gloves explains the trade-offs in detail.
Insulation matters too. Fleece is fast to dry and forgiving, while many synthetic insulations hold their shape and loft but take longer to release water. If you are weighing those options for your own kit, see our comparison of Thinsulate vs fleece gloves.
Easy to dry
- Fleece-lined synthetic gloves
- Thin knit liners
- Gloves with fully removable liners
- Open-cuff designs that let air circulate
Slow or fussy to dry
- Leather and suede
- Down or heavy insulation stitched in
- Long gauntlet cuffs with cinch cords
- Gloves with sealed waterproof inserts
If you cannot identify the material or read the label, choose the gentlest option: towel-press, open up, and air dry with airflow at room temperature. It takes longer, but it never causes damage.
Step 1Get Them Off and Open Them Up Fast
The clock starts the moment you stop being active. As soon as you are indoors, or sheltered if you are outside, take the gloves off and open them up. Do not stuff them into a coat pocket, a bag or a boot. A wet glove sealed in a dark space is already working toward mildew, and the cuff, the place water most often enters, stays shut and wet.
Remove them the right way
Pull the gloves off by the cuff rather than by the fingertips. Tugging on the fingers while the lining is wet and clingy can drag the liner out of position or tear stitching at the base of a finger. If the glove has a wrist strap, cinch cord or gauntlet closure, undo all of them first. These closures trap water against the cuff and slow drying significantly.
Once the gloves are off, turn the cuffs back and spread them wide. If the glove has a zipped or hooked pocket, empty it and open it. Anything in there, such as a hand warmer, a key or a tissue, will hold moisture and should come out now.
Do a quick wetness check
Not every wet glove is wet in the same way, and a quick assessment helps you choose the right amount of effort.
- Surface damp: the shell is wet but the liner feels dry. A short air dry will usually do.
- Soaked through: the liner squelches when pressed. Follow every step in this guide.
- Soaked and muddy or salty: rinse first (see below), then dry. Salt and grit left in a wet glove can stiffen fabric and damage leather as it dries.
If your gloves are dirty or salty
Road salt, mud and sweat do not disappear as a glove dries; they concentrate. If your gloves picked up a lot of grit or salt, rinse them briefly in cool water first, gently squeeze out the water and then begin the drying steps. For deeper cleaning, our guide on how to wash winter gloves walks through it properly. For lightly wet gloves, skip the rinse and go straight to the next step.
If you are not heading straight home, at least pull the gloves off and open them on the dashboard vent, the back shelf or the outside of your bag. Even a few open-air minutes make the later steps easier.
Step 2Squeeze and Press Out the Excess Water
This is the single most effective step for saving time. Heat and airflow can only evaporate water from the surface and the outer layers of the glove. Squeezing and pressing removes liquid water from the deeper insulation, which can cut drying time by hours.
Squeeze first, never wring hard
Hold the glove with both hands and squeeze from the cuff toward the fingertips, like pressing toothpaste from a tube. Work along each finger and the thumb. You are pushing the water out, not twisting it. Hard wringing twists the insulation, can tear stitching and permanently deforms the shape of leather, so keep the motion firm but straight.
For thick insulated gloves, you may need to squeeze several times, rotating the glove to reach both sides. Keep going until the drips slow to almost nothing.
The towel press
Lay a clean, dry towel flat. Place one glove in the middle, fold the towel over it and press down with your palms. For a stronger press, roll the towel and glove together tightly, or stand on the folded towel for ten to fifteen seconds. The towel acts like a sponge, pulling moisture out of the glove by contact.
- Spread a dry towel on a flat surface.
- Lay the glove flat with the fingers spread.
- Fold the towel over and press firmly along the whole glove.
- Open the towel. If it came away damp, swap in a dry section or a fresh towel and press again.
- Repeat until a press produces only a little dampness on the towel.
Use the right towel
A thick cotton bath towel or a microfibre sports towel works best. Use a colour you do not mind staining, as dyed leather and dark gloves can transfer a little colour when very wet. Avoid fluffy towels that shed lint inside fleece lining.
If the gloves are very large or very thick, two or three presses with fresh towels will outperform one long press with one wet towel. The more moisture you take out now, the less work every later step has to do.
A word on spin cycles
Some people toss soaked gloves in a washing machine on a spin-only cycle. For synthetic and fleece gloves with a label that allows machine washing, this can work, but it is not suitable for leather, down, wool or gloves with membranes whose labels advise against it. When in doubt, towel-pressing is safer and nearly as effective.
Twisting wet leather can crush the fibres and leave a glove stiff, misshapen or cracked once it dries. Always press and blot, never twist.
Step 3Reshape the Gloves and Separate the Liners
A wet glove collapses into a flat, clumped shape, and if it dries that way it stays that way. Insulation sticks together, fingers curl, and the inside surfaces press against each other, which traps moisture exactly where you do not want it. Taking a minute to reshape and open the glove sets up every later step.
Pull out removable liners
Many ski, snow and work gloves have a separate liner glove inside a shell. Remove it. Tug gently at the cuff of the liner and ease it out, taking care not to pull the fingers inside out where they are stitched to the shell. Separating them lets air reach all four surfaces, shell outside, shell inside, liner outside and liner inside, instead of just two.
If the liner is attached to the shell, as it is on many budget gloves, turn the shell cuff back as far as it will go, then gently roll the liner out. Only roll as far as it will move comfortably. Forcing a bonded liner can tear it away from the shell.
Reshape each finger
Open each finger with your own fingers and gently pull the fabric straight. Tease the thumb out, spread the palm and smooth any wrinkles. This is especially important with leather, which will dry in whatever shape you leave it. A glove left twisted or creased will stiffen that way and be uncomfortable the next time you put it on.
- Leather: use your hands to restore the shape, then leave the fingers slightly spread.
- Knit and wool: lay flat and smooth into the original outline. Trace the shape on a towel if you are worried about stretching.
- Insulated shells: fluff the insulation by pinching and releasing it between your fingers.
- Fleece: brush the fibres with your fingers to separate them.
Turn gloves inside out where it is safe
For fleece-lined gloves, plain synthetic gloves and many work gloves, turning them inside out is the fastest way to expose the damp lining. Leave leather, down and membrane gloves the right way around unless the label says otherwise, since turning them can damage the lining or the seam tape.
Damp, folded fabric is where odour starts. Opening the glove to full size lets moisture escape from the inside, which is the main thing that prevents that sour smell later.
Step 4Dry Them in Moving Air
Airflow is the quiet hero of glove drying. Evaporation depends on moisture leaving the surface and being carried away, and a still, humid room stalls that process. A glove sitting in the corner of a damp mudroom may take two days to dry, while the same glove in gently moving air can dry overnight.
Choose a good spot
Look for a place that is dry, reasonably warm and has some air movement: near a window that opens a little, a room with a ceiling fan, or beside a small desk fan. Avoid damp basements, bathrooms right after showering and cramped closets. The ideal location is a bright, comfortable living space that is not humid.
Raise the glove off surfaces
Do not lay wet gloves on a flat tabletop or a towel pile. The underside will stay wet. Instead, rest them on a wire or mesh rack, a drying rack with slats, a clean baking rack or even across the rungs of a chair. Anything that lets air flow underneath will speed up drying noticeably.
Alternatively, hang gloves by the cuff using clips or pegs on a line, a hanger or a shower rail. Hanging with the fingers pointing down lets remaining water drain out by gravity during the first hour. After that, switch to a flat or fingers-up position so air can circulate inside the fingers.
Add a fan
A small fan turns hours into minutes of difference. Aim it so the air passes over and, if possible, into the open cuff. Run it on a low or medium setting for a few hours. You do not need a heated fan, and in fact plain room-temperature air is the safest option for every glove material. A fan also helps avoid mildew in thick insulation because it keeps moisture moving out of the glove rather than sitting inside.
- Rotate the gloves every hour or two so each side faces the airflow.
- Keep the cuffs spread wide so air can enter.
- Leave a gap between pairs. Crowding gloves on a rack blocks airflow.
Use a dehumidifier in damp climates
In a humid home, or when drying many pairs at once, a small dehumidifier in the room pulls moisture from the air and gives drying a real boost. It is a good option for a mudroom or a family entryway where wet gloves, hats and boots all pile up in winter.
Press out the water, open the gloves, set them on a rack, and point a small fan at them. For most fleece or synthetic gloves, that is enough to have them dry by morning.
Step 5Add Gentle Heat (the Safe Way)
Heat speeds drying, but only up to a point. The key is to use warmth rather than heat. Think of a sunlit windowsill or the warm air near a heating vent, not a kettle or a campfire. Gentle warmth encourages moisture to leave the glove without stressing the materials.
Good heat sources
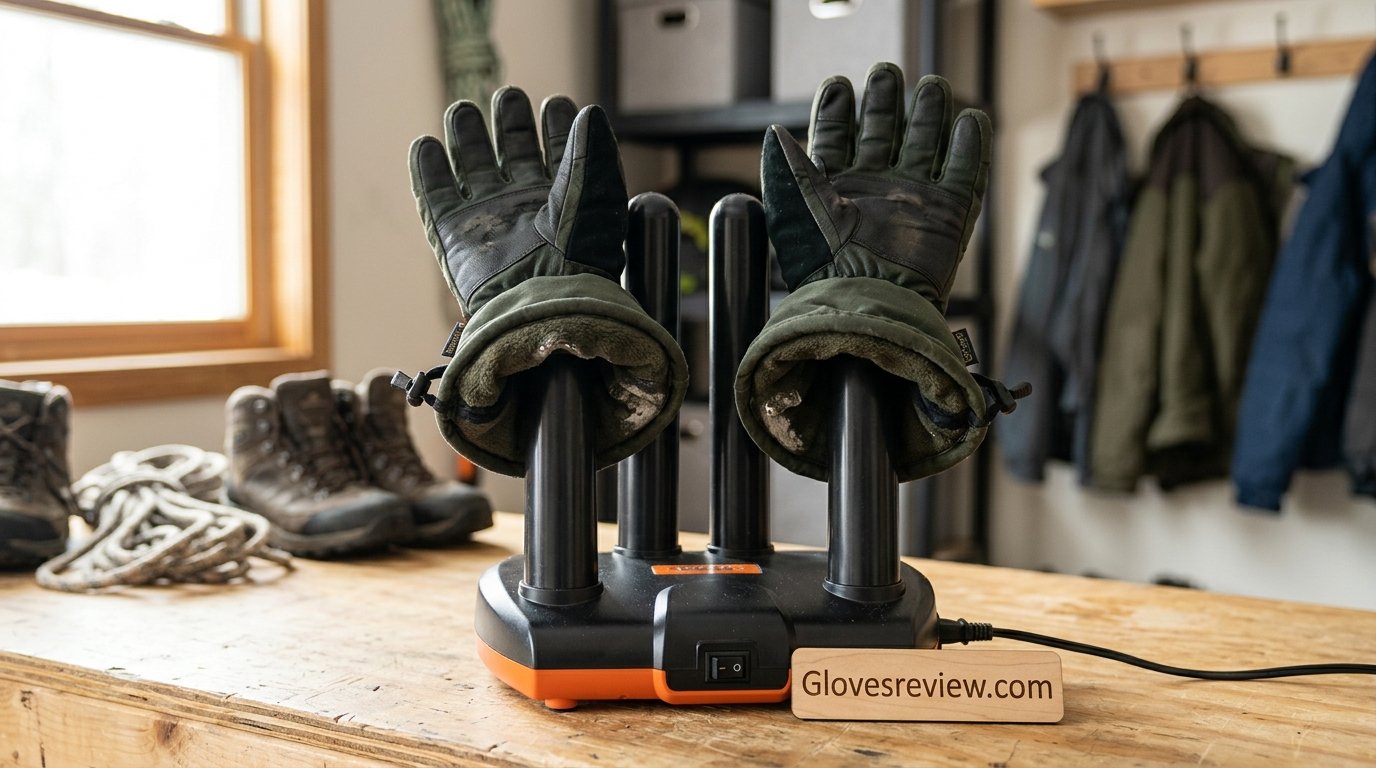
- Boot and glove dryers: these are designed for the job. They push gentle, warm air into each finger, which dries the inside of the glove where it matters most.
- Warm room air: a room at a comfortable indoor temperature is enough, especially with a fan.
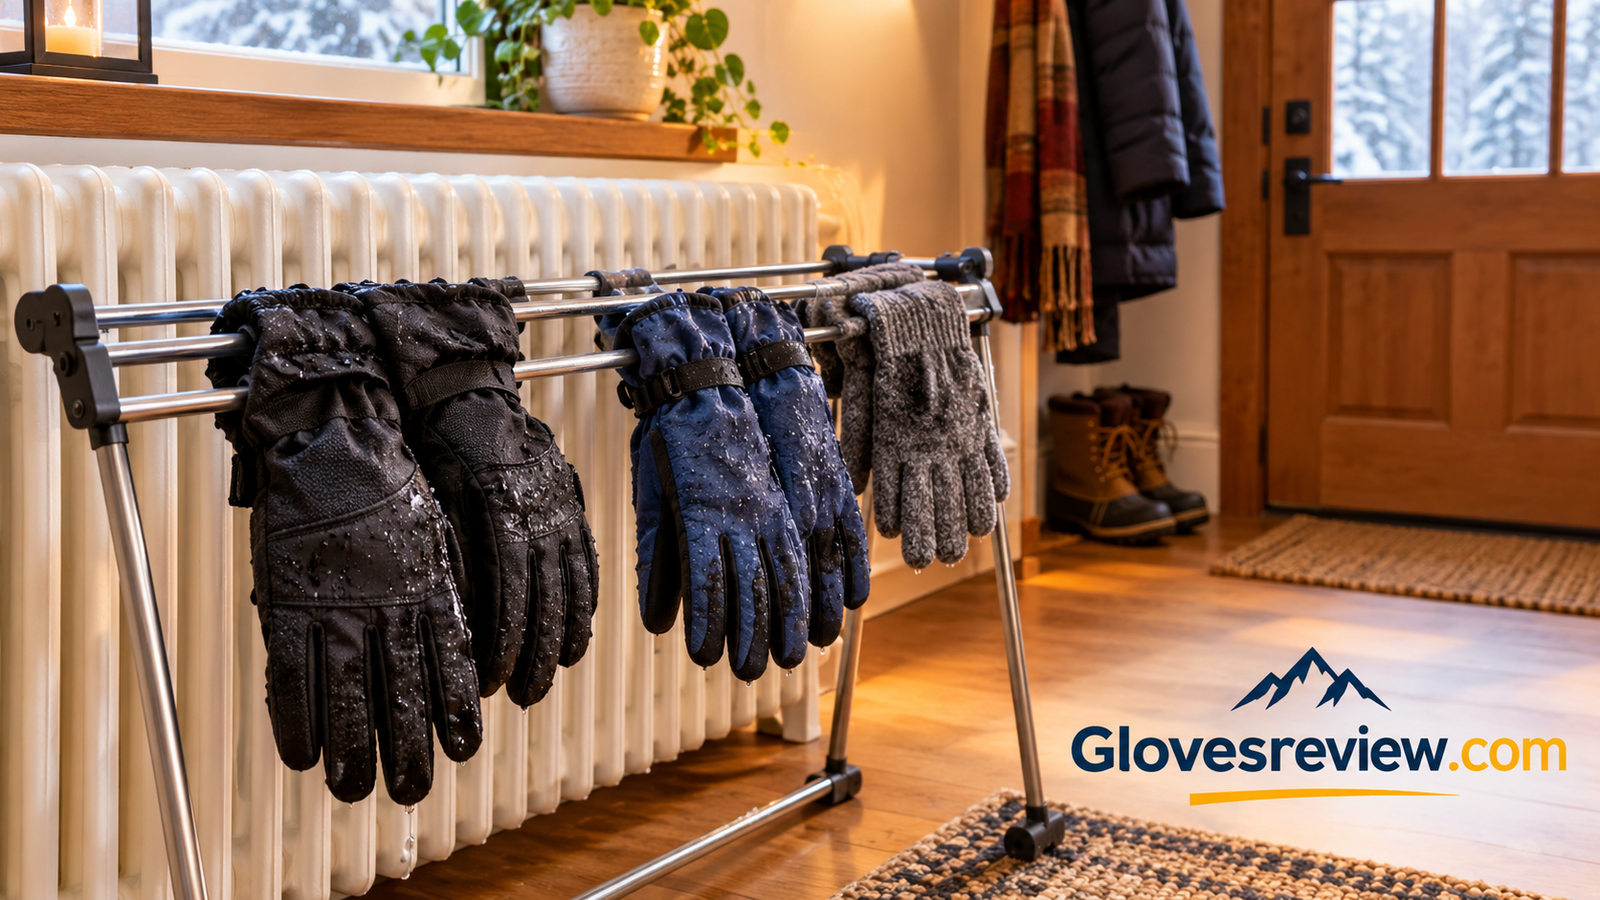
- Heating vents and radiators, used at a distance: set gloves on a rack near, not on, the heat source. Keep them far enough that they are never hot to the touch.
- Sunny windowsill: pleasant for synthetic gloves, but keep leather out of prolonged direct sun, as it can fade and dry unevenly.
The hand test
A simple rule: if you cannot comfortably hold your hand against the glove for ten seconds, it is too hot. Move it away from the heat. Leather and gloves with waterproof membranes are the most sensitive, and they should only ever feel mildly warm.
Using a glove or boot dryer
An electric dryer with prongs or tubes is among the best investments for anyone who gets gloves wet regularly. Slide a glove over each prong so the warm air reaches the fingers, and leave it overnight. Many are designed to run at a low, safe temperature for hours. Check the manufacturer’s guidance for your dryer and glove type, and do not leave any electrical device unattended in a way the instructions do not allow.
If your dryer has a timer or a low heat mode, use it for leather and membrane gloves. A cooler, slower dry is better for them than a fast one.
What to avoid
Safe warmth
- Low-heat glove or boot dryer
- Gentle fan with room-temperature air
- Rack placed a safe distance from a radiator
- Warm, dry room
Too hot
- Placing gloves directly on a radiator
- Hairdryer held close on high heat
- Open flame or campfire coals
- Microwave or oven
Direct, intense heat can shrink leather, melt glues and synthetic fibres, damage waterproof membranes and, in the worst case, start a fire. If you ever wonder whether something is too hot, it is.
Step 6Speed Things Up With Absorbent Stuffing
When you need gloves dry sooner, stuffing the fingers and palm with absorbent material does two jobs at once: it pulls moisture out of the lining and keeps the glove open so air can move through it. It is an old trick, and it still works.
What to stuff with
- Plain newspaper or unprinted paper: crumple loosely into balls and push gently into each finger and the palm. Printed ink can transfer to light linings, so use plain paper or paper towel if your gloves are pale.
- Paper towels: clean, absorbent and easy to swap out.
- Dry cotton cloth or rolled socks: good for the palm area of larger gloves.
- Dry microfibre cloths: great at pulling out moisture and do not shed lint.
How to stuff without stretching
Fill the glove loosely, enough to hold the shape and touch the inside walls but not so tightly that it stretches the fingers. Leather and knit gloves can be stretched out of shape by overstuffing, especially when wet. Think of it as a gentle support, not a mould.
Swap it out
The stuffing becomes damp as it works. Replace it every thirty to sixty minutes during the first few hours, and sooner if it feels wet when you squeeze it. Keep going until the replacement paper comes out dry. This is where most of the real moisture leaves the glove.
Pair stuffing with airflow
Stuffing alone helps, but it works best combined with Step 4. Leave the cuff open, set the gloves on a rack and keep the fan running. The paper wicks the moisture to the surface, and the moving air carries it away. Between the two, a pair of soaked ski gloves can often be ready within a night, even without a dedicated dryer.
A word on rice and other pantry tricks
You will sometimes see advice to pack gloves with uncooked rice or to bury them in it. It does absorb some moisture, but it is slow, messy and can leave starch or grains inside a lining. Paper and towels are cleaner and quicker.
Press out the water, stuff the fingers with paper towel, set the gloves on a rack in front of a fan, and swap the paper twice in the first two hours. That is the fastest safe method without any special equipment.
Step 7Confirm They Are Completely Dry Before You Wear or Store Them
A glove that feels dry on the outside can still be damp deep inside. Putting on a damp glove brings back the cold, and storing one invites mildew. Spend a minute checking before you call the job done.
The four-point check
- Fingertips: push a finger into each fingertip and press the lining. Fingertips are the thickest, slowest part to dry and the first place you will feel dampness.
- Thumb base: the web between thumb and palm holds moisture because the fabric overlaps there.
- Seams: run your finger along the inside seams. Stitching holds water longer than flat fabric.
- Cuff and wrist: check the cuff and any elasticated area, which is dense and slow to dry.
Use your cheek or inner wrist
Skin on the inner wrist or cheek is far more sensitive to dampness than fingertips. Press the inside of each glove against it for a few seconds. If you feel any coolness, there is still moisture inside, since evaporating water feels cold. Keep drying.
Smell and touch
A dry glove smells neutral. A faintly musty or sour smell means moisture or bacteria remain. The fabric should also feel soft and springy. Insulation that feels clumpy, heavy or cold to the touch is still holding water.
Let leather finish slowly
Leather often feels dry on the surface while the core remains slightly cool. Give it extra time at room temperature, and once it is fully dry, rub a little leather conditioner into the surface to restore suppleness. Leather that has been wet and dried without conditioning tends to feel stiff.
Fluff and rest
Once dry, gently work the glove with your hands to loosen the fibres and flex the fingers. Give them a final hour in open air before packing them away so any last moisture can leave. Never store a glove in a sealed bag or box until it is completely dry.
If you wear gloves every day in wet weather, owning two pairs and alternating them is the easiest way to guarantee that you always put on a fully dry pair.
Drying by Glove Type: Leather, Ski, Work, Wool, Fleece and Rubber
The seven steps above apply to every glove, but each type has its own quirks. Here is how to adjust the process for the pairs you are most likely to own.
Leather and suede gloves
Press out water gently with a towel, reshape by hand and dry at room temperature, well away from heat. Stuff lightly with paper to hold the shape and replace it when damp. When almost dry, work the leather with your fingers to keep it supple. Once fully dry, apply a conditioner. Never use a radiator, hairdryer or direct sun on leather, as it will shrink and stiffen.
Insulated ski and snowboard gloves
These are the trickiest because of their layered construction. Pull out the liners, open the gauntlet and cinch cords, and dry the shell and liner separately. A boot dryer or glove dryer is ideal. Many ski gloves have waterproof membranes, so use only low warmth and never leave them on a hot radiator. If you ski or board regularly, a dedicated dryer will pay for itself.
Work gloves and coated gloves
Turn them inside out, press out the water and air dry. Coated palms made of latex, nitrile or polyurethane can crack when exposed to high heat, so keep them well away from radiators. Heavy leather work gloves follow the leather rules above. If you wear them daily on job sites, our guide to the best winter work gloves covers options that handle wet conditions well.
Wool and knit gloves
Wool is forgiving when wet but fragile when handled roughly. Press it between towels without twisting, reshape on a dry towel and lay flat to dry away from direct heat. Hanging heavy wet wool by the fingers can stretch it. Heat and agitation make wool shrink and felt, so avoid tumble drying unless the label specifically says it is safe.
Fleece gloves and thin liners
These are the easiest. Squeeze, shake, reshape and set them on a rack. Fleece dries fast and tolerates mild warmth. If the label allows, a short low-heat tumble can fluff them, but air drying keeps the pile soft longer.
Rubber and waterproof shell gloves
Gloves made of rubber or PVC are designed to keep water out, so the main problem is moisture inside. Turn them inside out if the lining allows, hang them with the fingers pointing down and let them air dry. Keep them out of the sun, since UV and heat make rubber brittle over time.
Down-filled gloves and mittens
Press out as much water as you can, then dry in a well-ventilated space. Down needs thorough drying to avoid clumping and mildew. If the label allows, a low-heat tumble with a few clean dryer balls can restore loft, but check the label first. Damp down is slow to dry, so be patient.
| Glove type | Quick method | Approx. time at room temp with fan |
|---|---|---|
| Fleece liner | Press, rack, fan | A few hours |
| Wool knit | Press, lay flat, fan | Several hours to overnight |
| Leather | Press, reshape, slow air dry | Overnight or longer |
| Insulated ski glove | Separate liner, dryer or fan | Overnight |
| Down mitten | Press, ventilated air dry | Overnight to a day |
| Coated work glove | Inside out, air dry | A few hours to overnight |
These times are rough guides. Thickness, humidity and airflow all change the result, so always use the touch test from Step 7 rather than the clock.
Common Mistakes and When Machine Drying Is (and Is Not) Okay
Most ruined gloves come from a handful of avoidable mistakes. Knowing them saves money and keeps your hands warm.
Mistakes to avoid
- Placing gloves directly on a radiator or heater: it feels efficient, but the heat is uneven and intense, and it can shrink and crack leather and damage adhesives and membranes.
- Using a hairdryer at close range: the concentrated hot air can scorch fabric and melt synthetic fibres. If you must use one, keep it on low and constantly moving, well back from the glove.
- Wringing hard: twisting damages insulation, stitching and leather.
- Leaving gloves balled up in a bag or pocket: this traps moisture and invites mildew and odour.
- Skipping the liner separation: a wet liner inside a shell can stay damp for days.
- Wearing gloves that are still damp: they chill your hands faster and rub, which can lead to blisters and cold injury in harsh weather.
- Storing gloves before they are fully dry: mildew and odour set in quickly.
- Using heat on waterproof membrane gloves: high heat can break down the membrane or the tape that seals the seams.
Can you put gloves in a clothes dryer?
It depends entirely on the glove. Many fleece, polyester and some cotton gloves tolerate a low-heat, short tumble. Always check the care label first. If the label allows machine drying, use the lowest heat setting, add a dry towel to absorb moisture and take the gloves out while slightly damp to finish by air.
Often fine on low heat
- Fleece and polyester liners
- Basic cotton gloves
- Some synthetic work gloves, if the label allows
Keep out of the dryer
- Leather and suede
- Wool (shrinks and felts)
- Gloves with waterproof membranes unless the label says it is safe
- Rubber, latex or coated gloves
What about washing first?
Washing and drying go together. If a glove is dirty or sweaty as well as wet, a proper wash followed by careful drying will refresh it. Follow the label for water temperature and detergent, and then use the steps in this guide. Our guide on washing winter gloves covers the full process.
Never leave gloves unattended against a heater, near an open flame or in a hot oven. Fabrics and glues can scorch or ignite, and no pair of gloves is worth a fire.
Prevention, Storage and the Gear That Makes Drying Easier
The easiest wet glove to dry is the one that never got soaked. A few small habits reduce how often you face the problem, and a handful of tools make it quicker when you do.
Keep water out in the first place
Wear cuffs over jacket sleeves in rain, and under them in deep snow, so water is shed rather than funnelled in. Choose a glove with a cinch closure for wet days. Brush snow off gloves before coming inside rather than letting it melt into the fabric. If your gloves have lost their water repellency, a proofing treatment can help, and our walkthrough on how to waterproof gloves explains how to restore it.
Carry a spare pair
A thin spare pair in a bag lets you swap out soaked gloves mid-day. It is one of the best habits for hikers, skiers, commuters and anyone who works outdoors, because it breaks the cycle of cold, wet hands. Staying warm also depends on what you wear and how you layer, so see our tips on how to keep hands warm in extreme cold for more.
Store gloves properly
Once dry, store gloves flat or loosely hung, in a breathable spot such as a drawer, basket or open shelf. Avoid airtight plastic bags and sealed boxes, which trap residual moisture. For long-term storage at the end of the season, make sure the gloves are bone dry, add a cedar block or a sachet to deter moths in wool, and keep them out of direct sunlight.
A simple home drying station
If gloves, hats and boots regularly come in wet, a small dedicated space is worth setting up. A wall-mounted rack or a freestanding folding rack, a boot tray, a small fan or a low-heat dryer, and a basket of spare towels cover almost everything. Put it in a hallway or mudroom where airflow is good, and the whole family will use it.
Handy gear checklist
- A glove and boot dryer with a low-heat setting
- A folding drying rack or clip hangers
- Thick, absorbent towels for the pressing step
- A small fan for quiet, steady airflow
- Leather conditioner for leather gloves
- Spare liners or a second pair of gloves
- Waterproofing spray appropriate for your glove material
Choose gloves that dry faster next time
When you shop for a replacement, look for removable liners, breathable membranes, quick-drying synthetic insulation and a cuff that opens wide. Good fit also helps because a glove that is too tight compresses insulation and holds moisture. If you are unsure of your size, our guide to measuring your hand size for gloves makes it easy.
Open them up as soon as you are in, press out the water, give them airflow, and check them before they go away. That short routine takes minutes and doubles the life of most gloves.
Frequently Asked Questions About Drying Wet Gloves
How long does it take to dry wet gloves?
It depends on the material, thickness and airflow. Thin fleece or knit gloves can dry in a few hours with a fan, while thick insulated ski gloves or leather gloves usually need overnight. Pressing out water first and opening the liners cuts the time noticeably. Use the touch test from Step 7 rather than relying on the clock.
What is the fastest way to dry wet gloves?
Squeeze out the water, press the gloves between dry towels, separate any liners, stuff the fingers with paper towel and place them in front of a fan or on a low-heat glove dryer. Swap the paper every thirty to sixty minutes. This combination removes the most water in the least time without damaging the gloves.
Can I dry gloves on a radiator?
It is better not to place gloves directly on a radiator. Direct heat can shrink leather, damage glues and membranes and become a fire risk. If you want to use a radiator, set the gloves on a rack a safe distance away so they never feel hot, and keep an eye on them.
Can I put wet gloves in the dryer?
Some can. Fleece, polyester and basic cotton gloves often tolerate a short, low-heat tumble if the care label allows it. Leather, wool, rubber and many waterproof or insulated gloves should not go in a dryer. Always check the label first, and when unsure, air dry.
How do I dry leather gloves without ruining them?
Press out water gently with a towel, reshape the fingers by hand, stuff lightly with paper and let them dry slowly at room temperature, away from heat and direct sun. When they are nearly dry, flex them to keep them supple, and apply leather conditioner once fully dry.
How do I dry ski or snowboard gloves overnight?
Remove the liners, open the gauntlets and cinch cords, press out excess water and place the shell and liners on a boot or glove dryer, or on a rack in front of a fan. Keep the heat low, especially for gloves with waterproof membranes. Most are dry by morning.
Can I use a hairdryer to dry gloves?
You can in a pinch, but it is not ideal. Use the lowest heat setting, keep the dryer well away from the glove and keep it moving so no spot gets hot. Never use it on leather or membrane gloves at close range. A fan and paper stuffing is safer and almost as quick.
How do I get the smell out of damp gloves?
Smell comes from moisture and bacteria, so the best fix is to dry the gloves completely. If a smell lingers, wash them according to the label, then dry fully with plenty of airflow. A light wipe of the lining with diluted white vinegar can help on some synthetics, but test a small area first and skip it on leather.
Is it bad to wear gloves that are still a little damp?
It is best to avoid it. Damp insulation loses much of its warmth, so your hands cool faster, and in very cold conditions that raises the risk of numbness and cold injury. Damp gloves can also rub and cause blisters. Switch to a dry pair if you can.
Should I dry gloves inside out?
For fleece-lined, synthetic and many work gloves, yes, turning them inside out exposes the damp lining and speeds drying. Leave leather, down and membrane gloves the right way around unless the care label says otherwise, since turning them can damage seams and linings.
Does rice help dry wet gloves?
Rice absorbs a little moisture but it is slow and messy, and grains or starch can get stuck inside the lining. Crumpled paper towel, plain newspaper or a dry cloth are cleaner and faster.
How can I stop my gloves from getting so wet?
Choose gloves with a waterproof or water-resistant shell and a closing cuff, brush off snow before coming inside, wear cuffs over or under sleeves to shed water, keep the proofing in good shape and carry a spare pair. A little prevention saves a lot of drying time.
What is the best way to store gloves after drying?
Make sure they are completely dry, then store them loosely in a breathable place such as a drawer, basket or open shelf. Avoid sealed plastic bags. At the end of the season, clean them, dry them fully and keep them away from direct sunlight.
Conclusion: Dry Gloves Are a Few Simple Habits Away
Drying wet gloves does not need special skill or expensive equipment, just a little patience and the right order of operations. Get the gloves off and open, press out the water, reshape them and separate the liners, give them moving air, add only gentle warmth, use absorbent stuffing when you need speed, and always check that they are completely dry before wearing or storing them. Each step builds on the one before it, and skipping the early ones is what makes the later ones slow.
Match the method to the material. Leather wants slow, cool drying and a conditioner afterward. Wool wants gentle handling and flat drying. Fleece and synthetics are forgiving. Insulated ski gloves reward a proper dryer and separated liners. If you remember one thing, make it this: moving air and patience beat heat every time.
With a good routine and a few well-chosen tools, your gloves will be warm, soft and ready for the next cold, wet day, and they will last far longer too.